CloudConnexa + Intune: Zero-Trust Remote Access
Your remote access is fine, until someone leaves
Most small-business remote access is a shared VPN config that has been sitting in a Teams chat for three years, an RDP port someone swears is safe because it is not the default one, and no clean way to answer the one question that matters when a person walks out the door: what can they still get into?
In this post I build the fix, starting from nothing. You will sign up, deploy a connector, and get identity-driven, segmented remote access running on the free tier. Then, the day you have a team, you tie sign-in to Microsoft Entra ID over SAML and push the OpenVPN Connect client across a Windows fleet through Intune with the Cloud ID already filled in. I will show the SSO error I hit on the first try, the single Intune setting that quietly breaks the rollout, and the offboarding trap that catches almost everyone.
The short version: Sign up, spin up a small Linux VM, and paste CloudConnexa’s one-line script to install a connector. That alone gets you split tunnel, intrusion detection, DNS and audit logs, location rules, and device-posture checks, on the free tier. When you add staff, switch authentication to SAML, register CloudConnexa as an Entra enterprise app, and map the Group claim so access follows group membership. Deploy the client with
wingetfor one machine, or two Intune Win32 apps for a fleet. Offboarding then becomes one move at the identity layer.
Why this instead of a classic VPN
A classic VPN drops you onto the office network and trusts you with everything on it. The model here is a doorman: it checks who you are at the entrance, walks you to exactly the resource you are allowed to reach, and writes down that you went there. Identity at the front, access scoped to one thing instead of the whole network, and a log of it. That is what people mean by zero-trust access.
The tool is CloudConnexa. Yes, it is from OpenVPN, the same name behind the open-source protocol, but CloudConnexa is a different product: a cloud-managed access service, not a point-to-point tunnel. Keeping remote access identity-bound, segmented, and logged maps directly onto the NIS2 risk-management measures around access control and secured communications. General guidance, not legal advice.
Step 1: Sign up and let the wizard drive
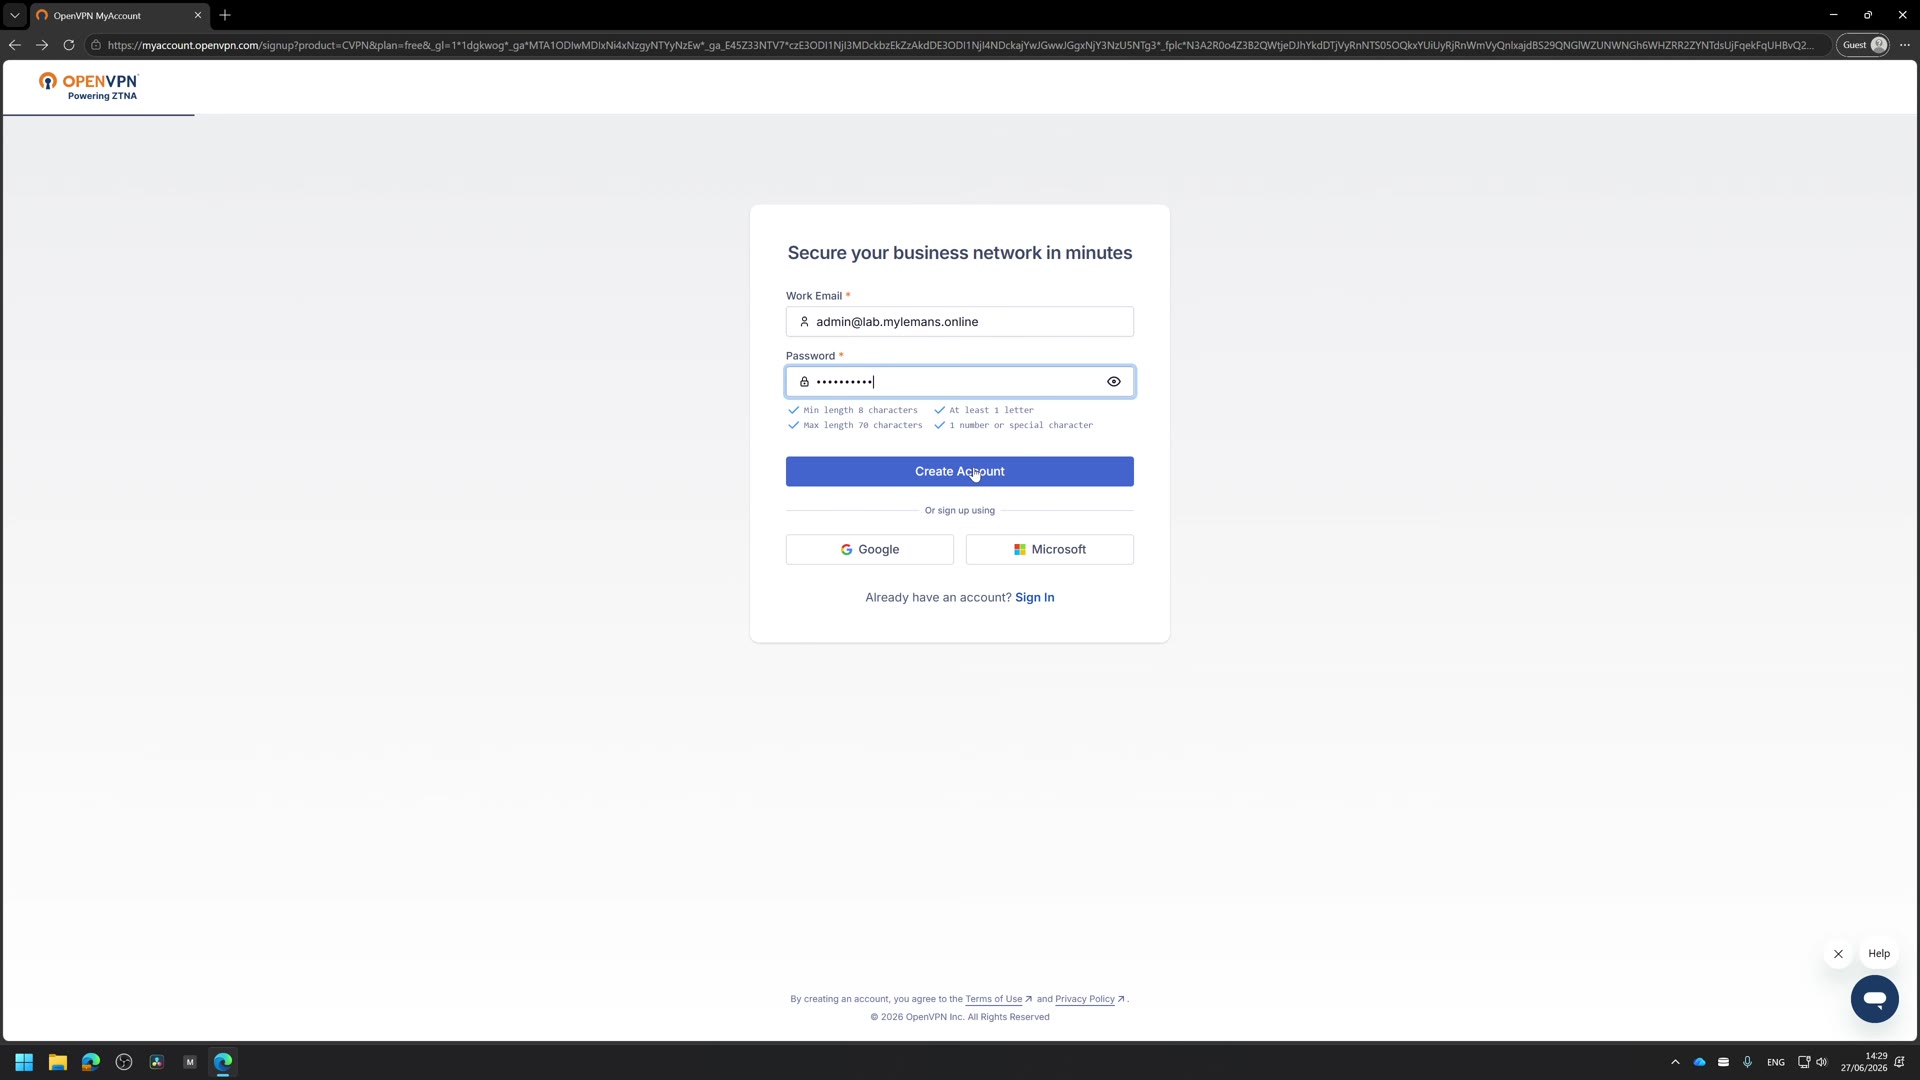
Start from nothing. Create a CloudConnexa account with a work email, or use a Google or Microsoft account, and verify the code. That signup link is my referral link, so I get a cut if you ever pay for a plan. The free tier is free either way, and nothing in this post needs you to spend anything.
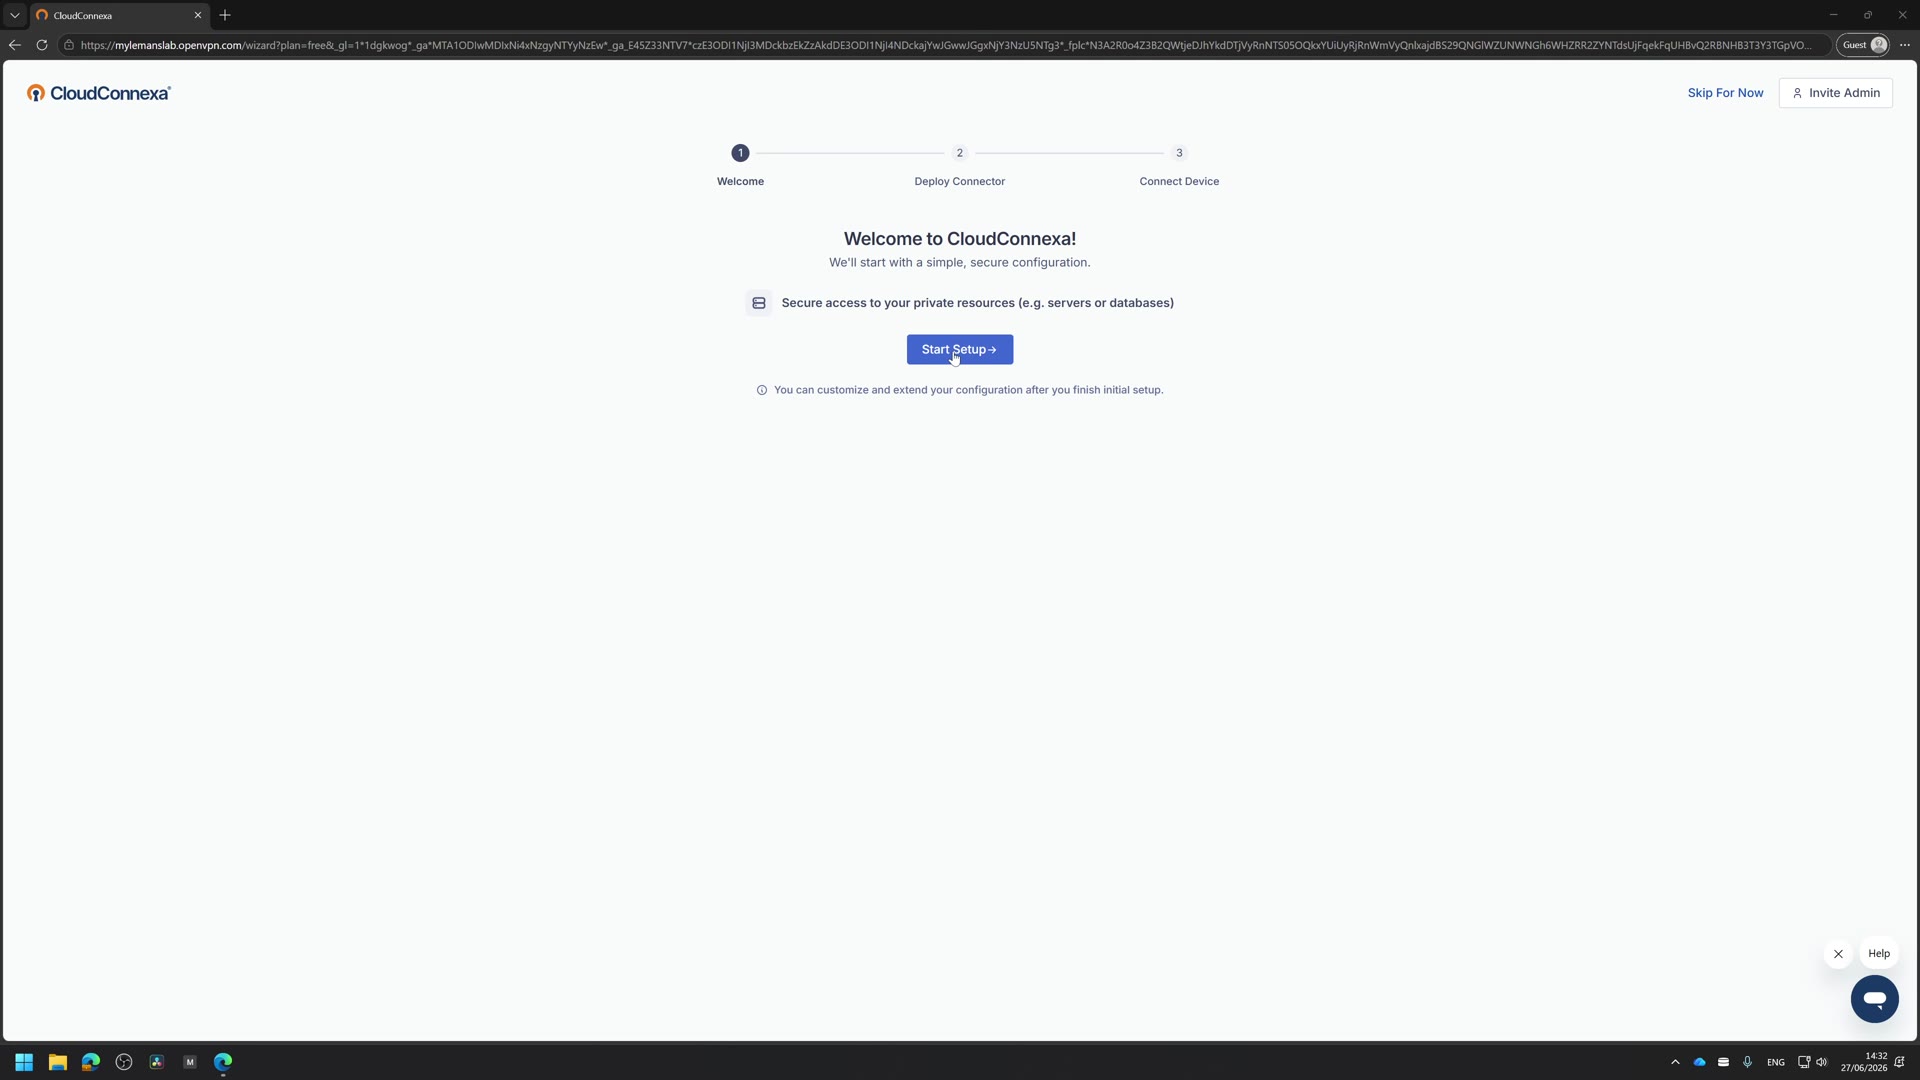
It does not drop you into a blank dashboard and wish you luck. It is a three-step wizard: deploy a connector, connect a device, done.
Step 2: Give the connector somewhere to live
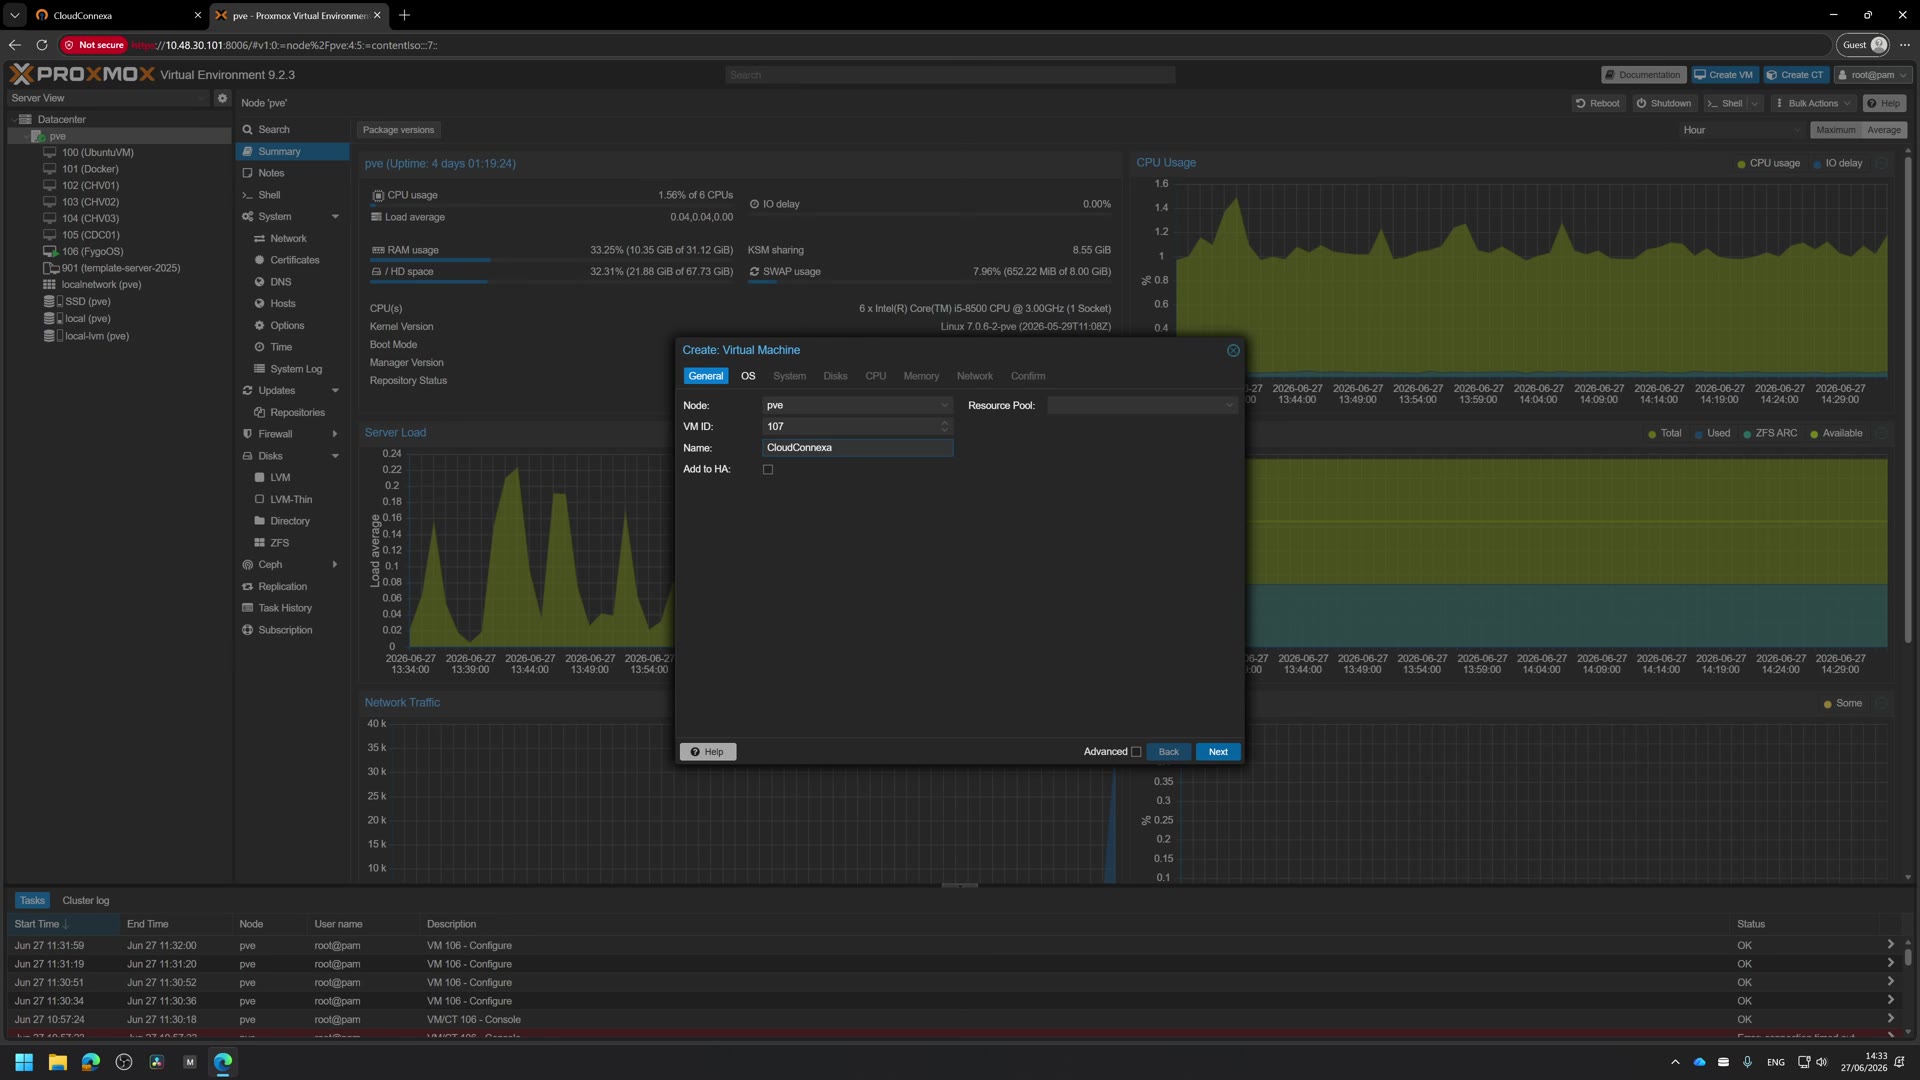
The connector is the only piece that touches your own network. It needs a host, so on my Proxmox box I spin up a small Ubuntu VM. Nothing fancy, just somewhere for it to run. A Raspberry Pi or an old mini PC works too.
Step 3: Deploy the connector
Back in CloudConnexa you tell it where the connector is going. It is not just AWS, Azure or GCP; pick Other and a plain Linux box. Choose your OS (Linux), your distribution (Ubuntu 24.04), and the region closest to you, which for me is Brussels.
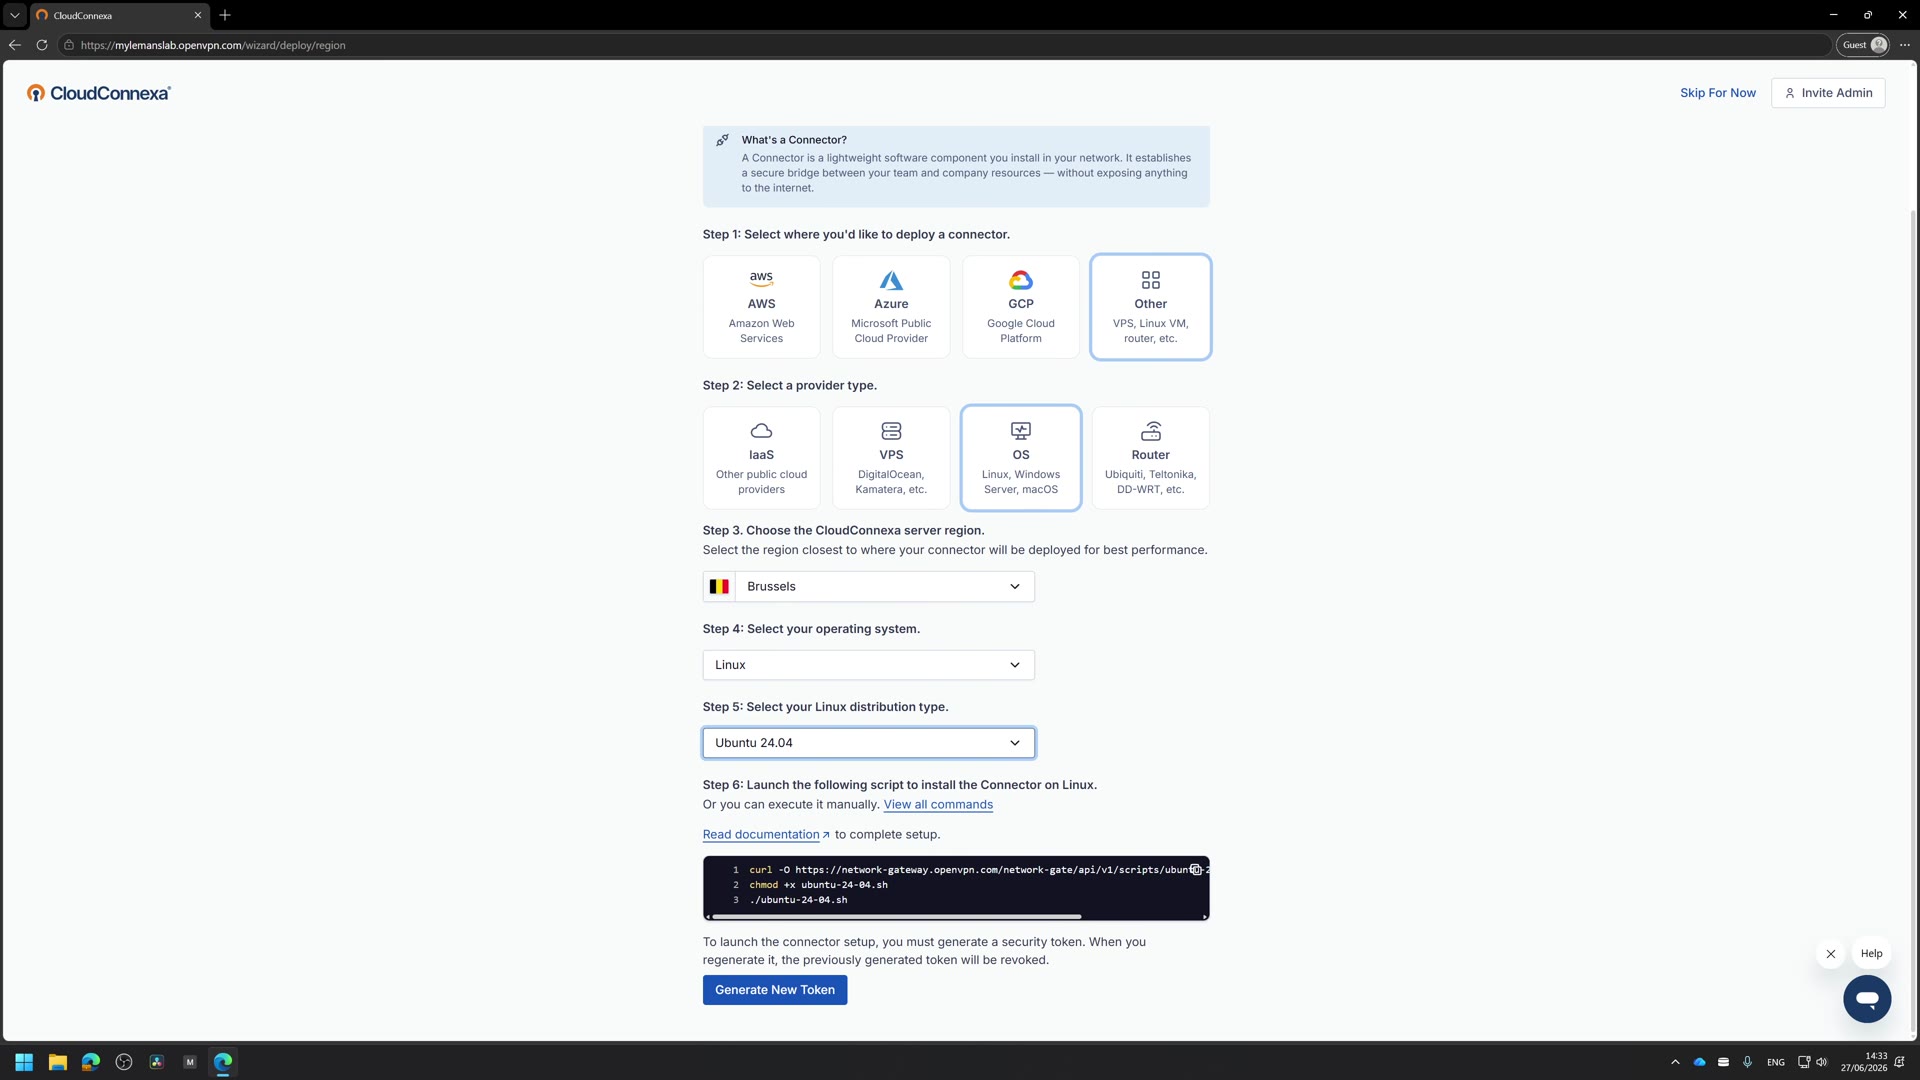
It hands you back a one-line script and a token. That token is how the box proves it is yours, and if you ever hit Generate New Token the old one is revoked immediately. Treat it as a one-time key.
SSH into the VM and paste the command. It pulls itself down, installs, and registers.
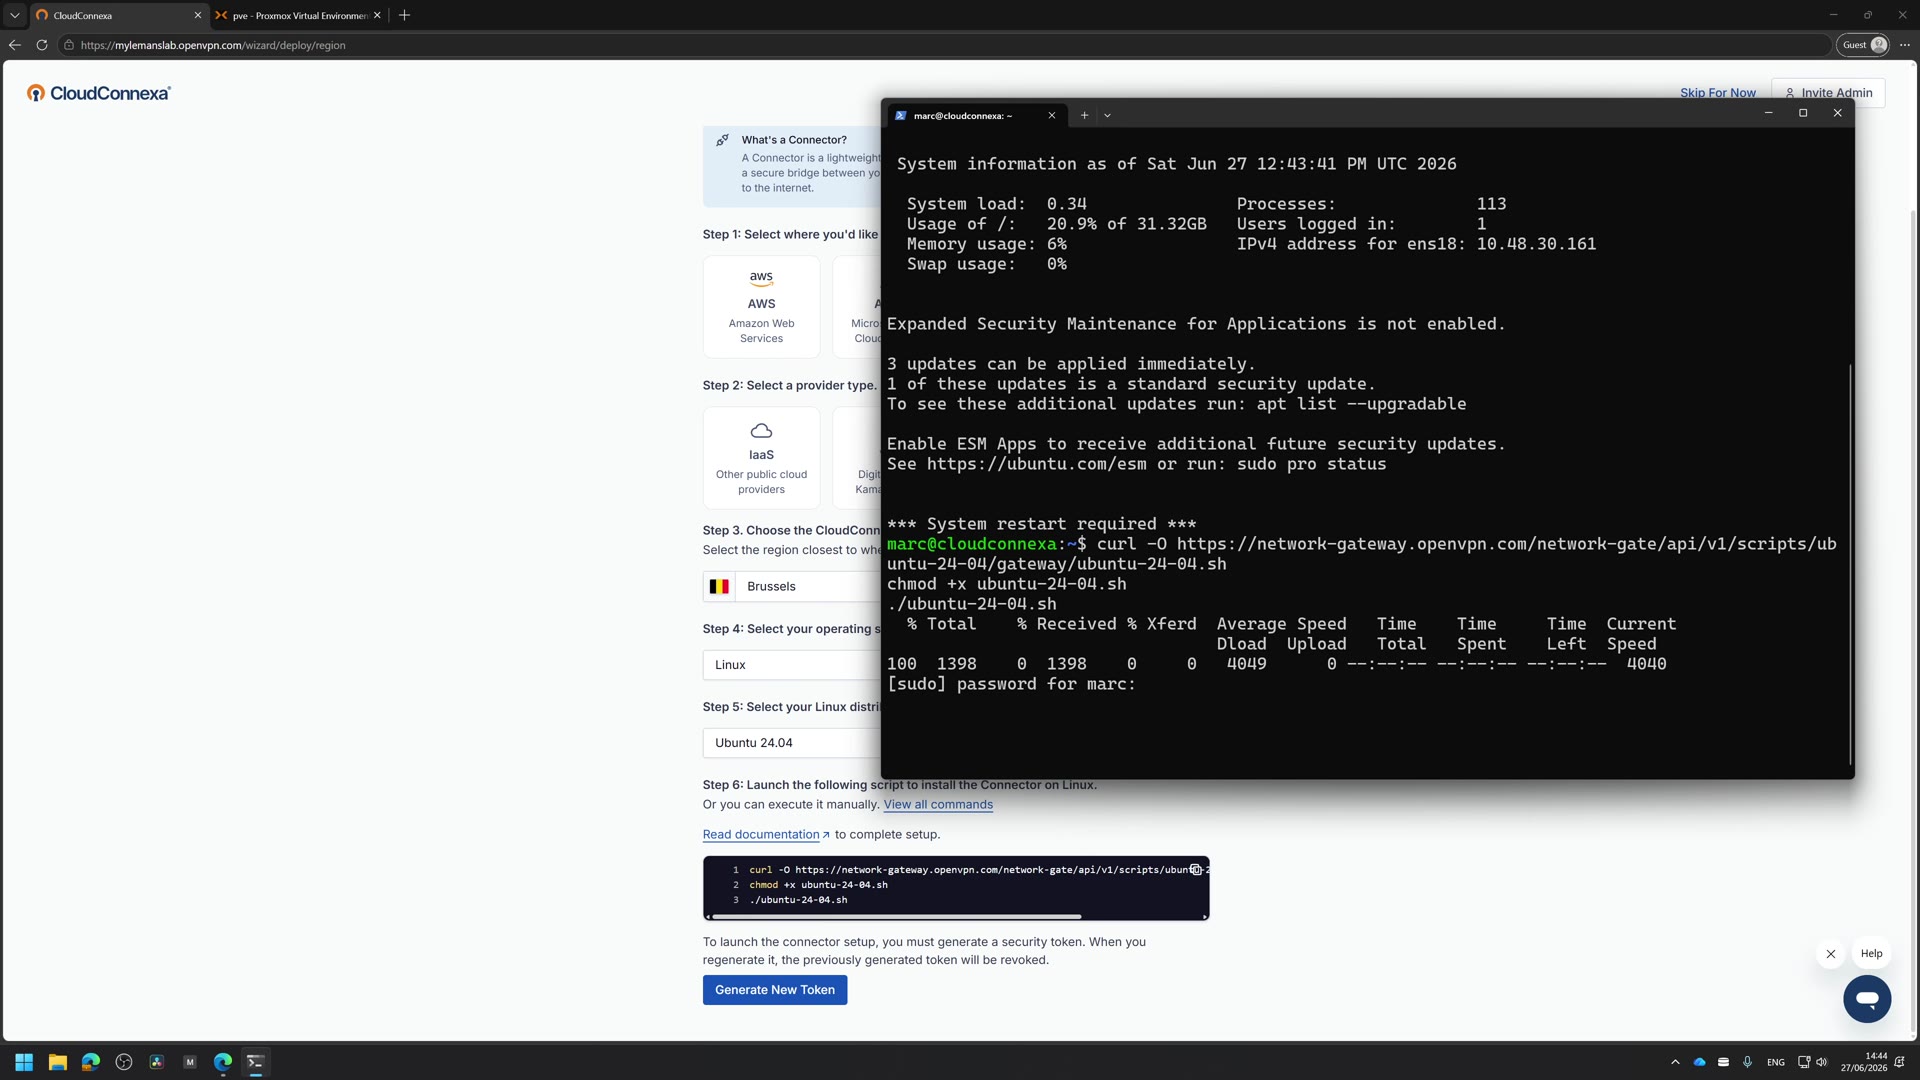
Notice what did not happen: no port forwarding, and nothing opened from the outside. The connector reaches out, the internet never reaches in. That property alone is why this is safer than the RDP port you are trying to retire.
Here is the nice part: the wizard already created the network as well as the connector, so there is nothing else to build. Open Networks and you will see it sitting there, connector reporting Online, with the description telling you it was created in the onboarding wizard. It is already set to Split Tunnel On, which matters in a minute.
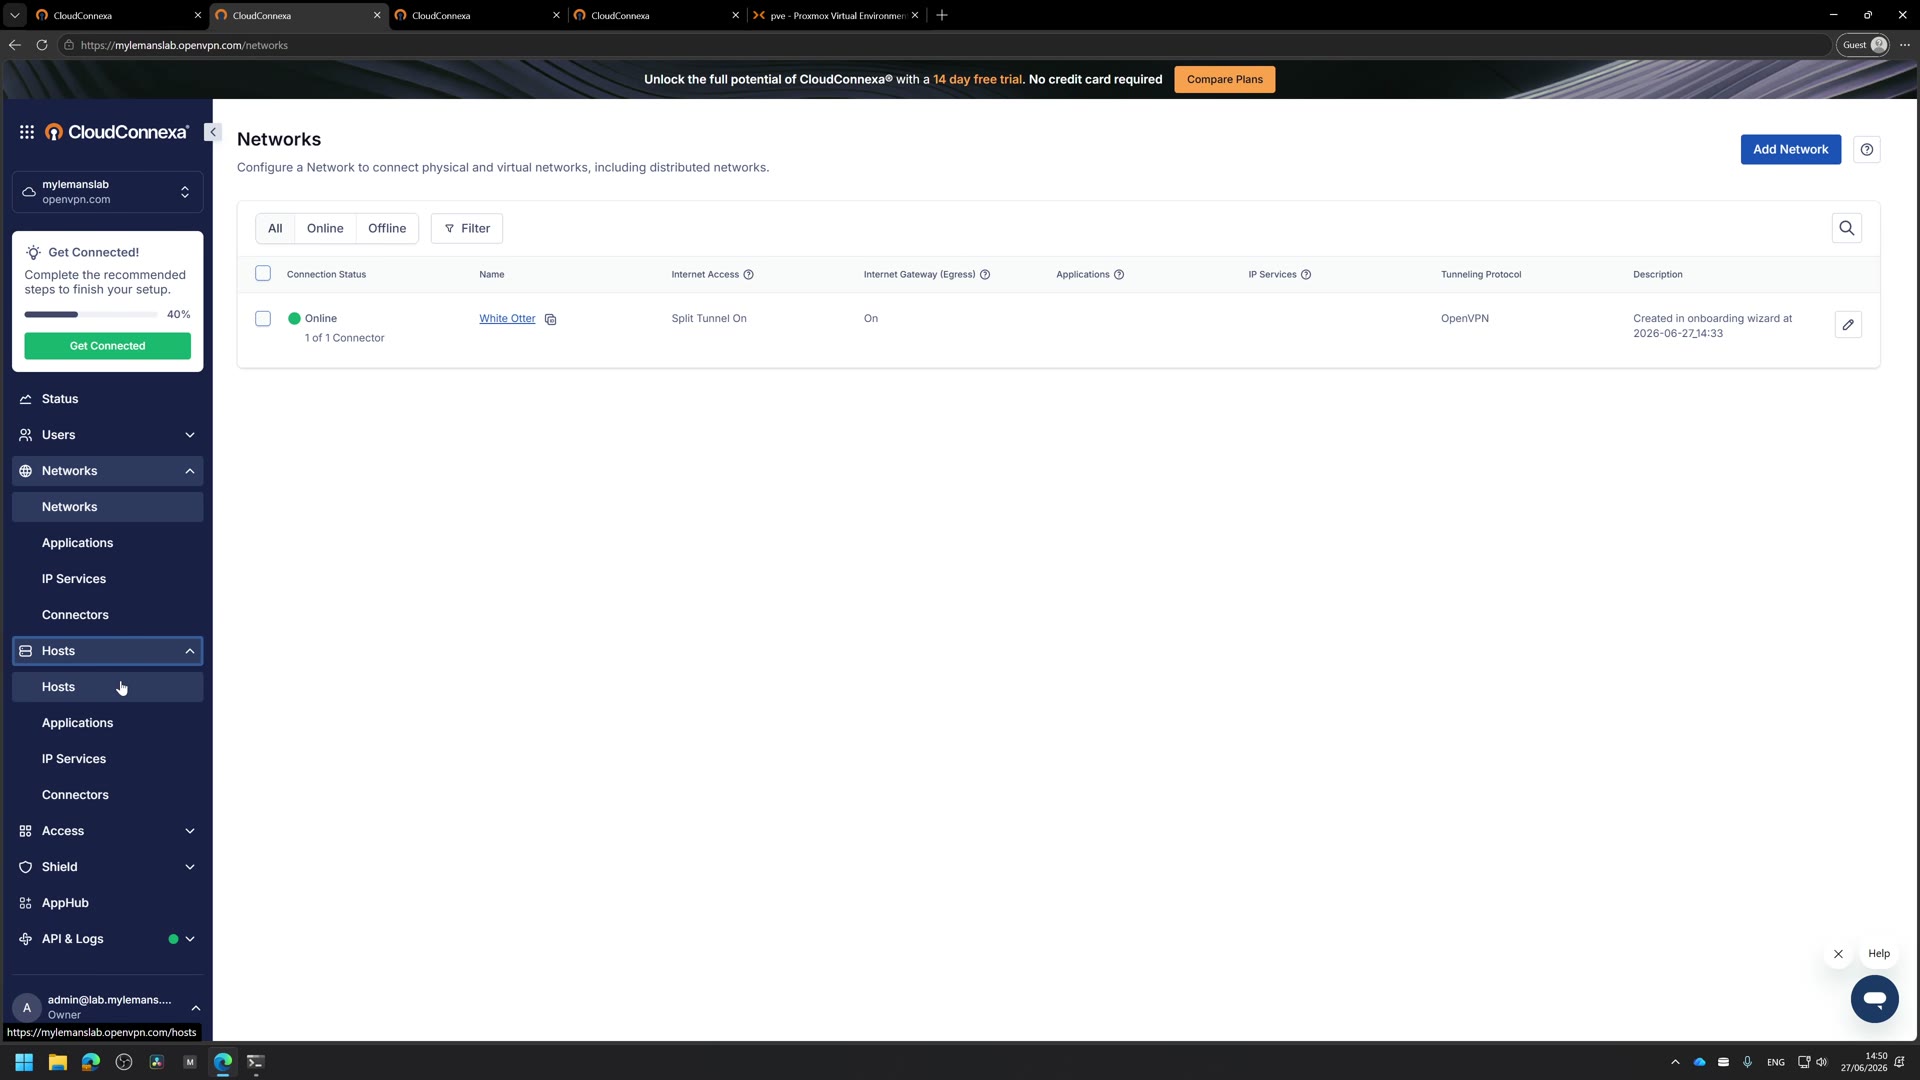
You only come back to this page when you want to add another network later. If the connector never reports online, it is almost always that the host cannot reach the subnet you told CloudConnexa it serves, or outbound 443 is blocked from that box.
What you actually get for free (this surprised me)
This is the part most write-ups skip, so let me be specific. Everything in this section is on the free plan.
Split tunnel. A single toggle (“Set as only VPN”) decides whether all traffic goes through CloudConnexa or only the traffic bound for your network. Leave it off and only lab traffic is tunnelled, everything else stays on the local connection. That is why this stays usable on slow hotel or holiday Wi-Fi.
Cyber Shield. Two things in one: domain filtering, which watches every category and blocks the malicious ones out of the box (it monitors all categories and blocks 8 of 43 by default, and you choose the rest), and traffic filtering, which is the intrusion detection side. There is a drill-down dashboard for observed and blocked domains and traffic.
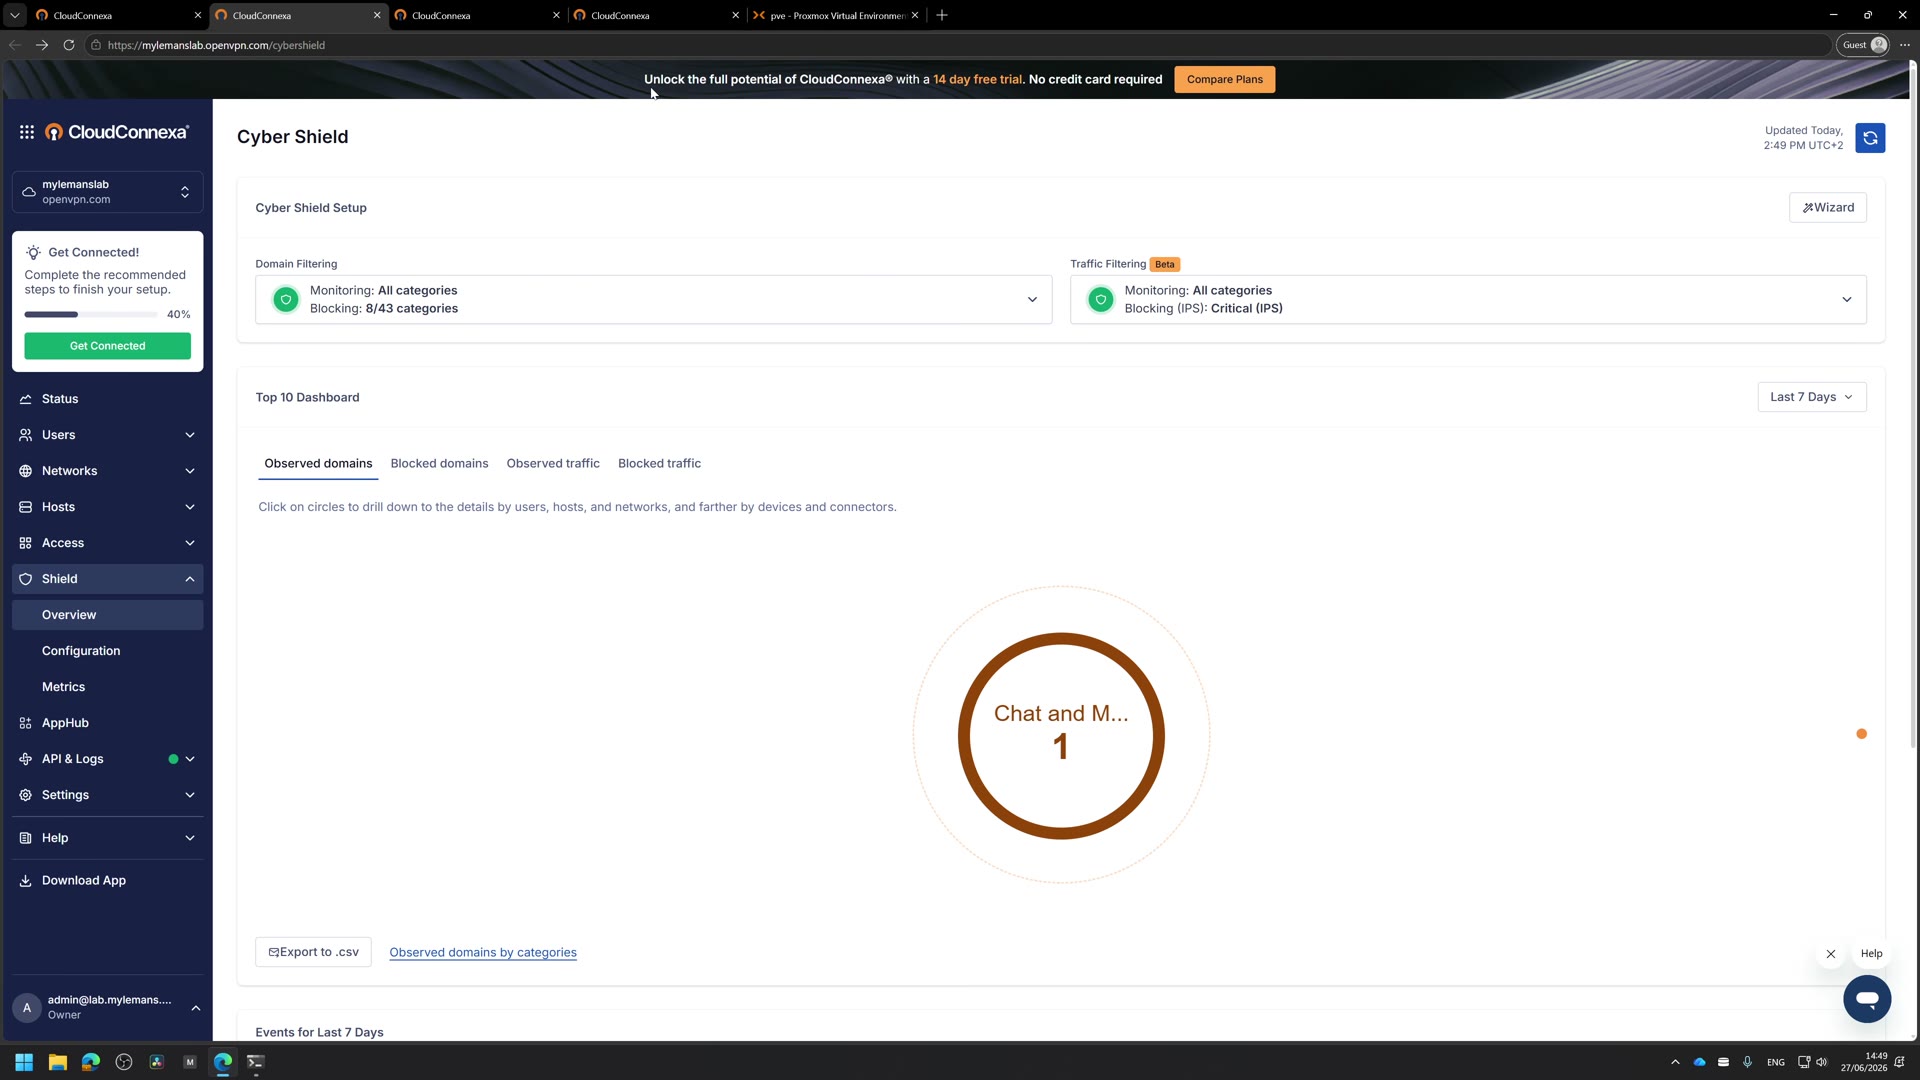
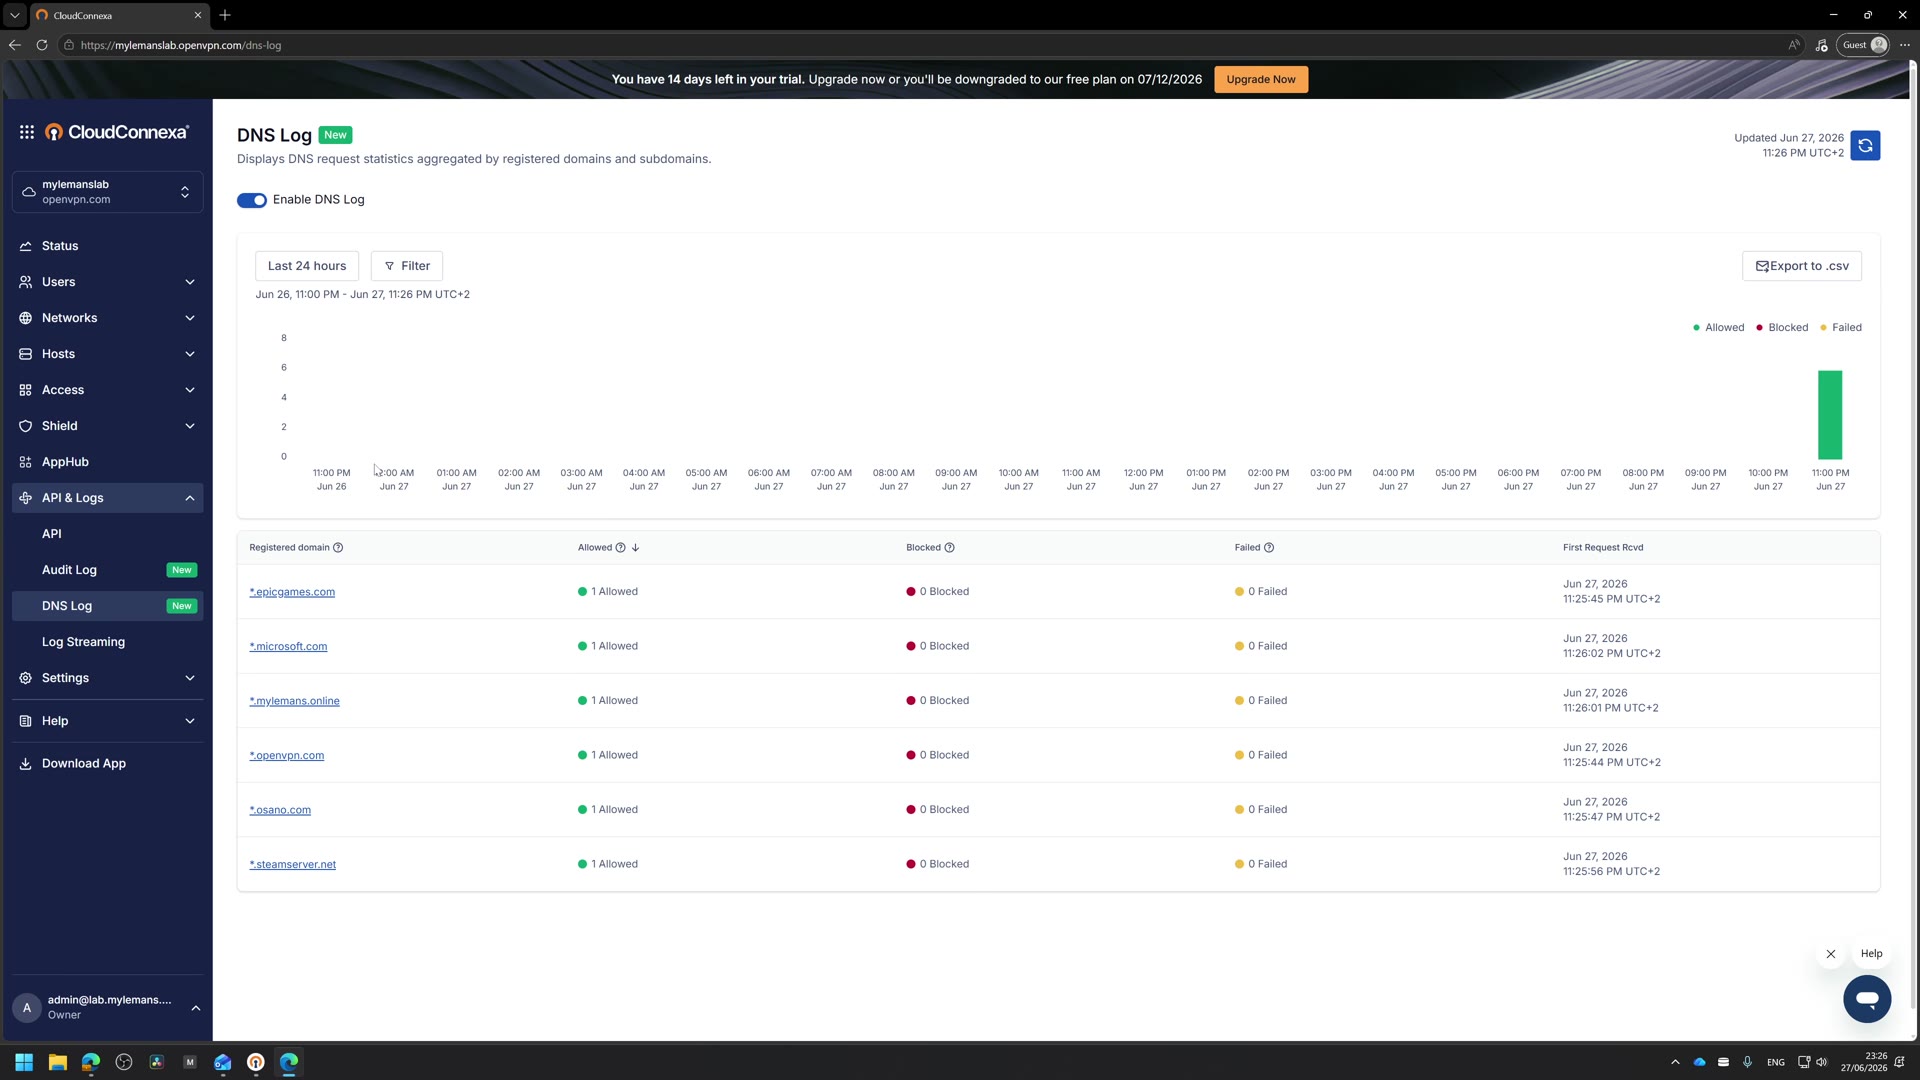
Logging. Every request is logged, allowed or blocked, with a timestamp, plus an audit log of who changed what. This is the difference between “trust me” and being able to prove it.
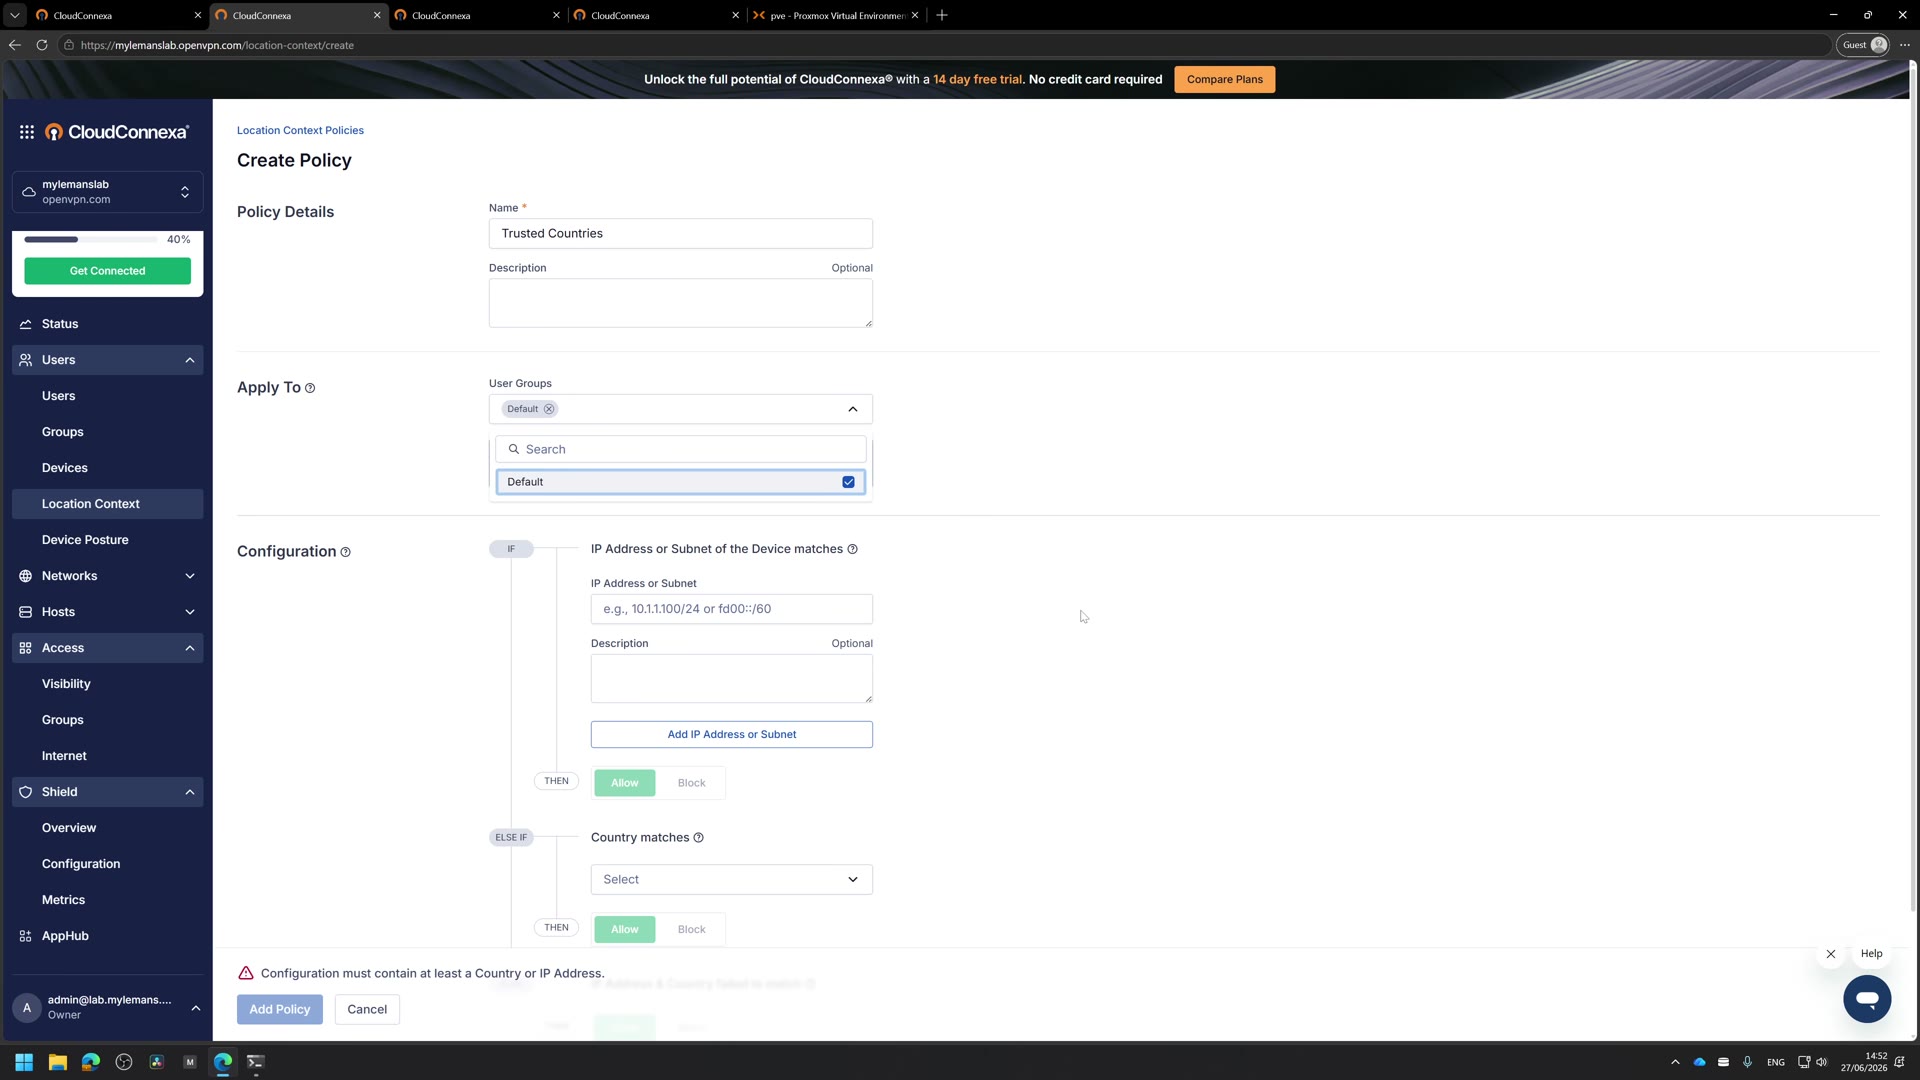
Location rules. A Location Context policy is plain if-this-then-that. If the device’s IP or subnet matches, allow or block. Otherwise, if the country matches, allow or block. So “allow from Belgium, block everywhere else,” or pin access to a known IP range. I called mine “Trusted Countries.”
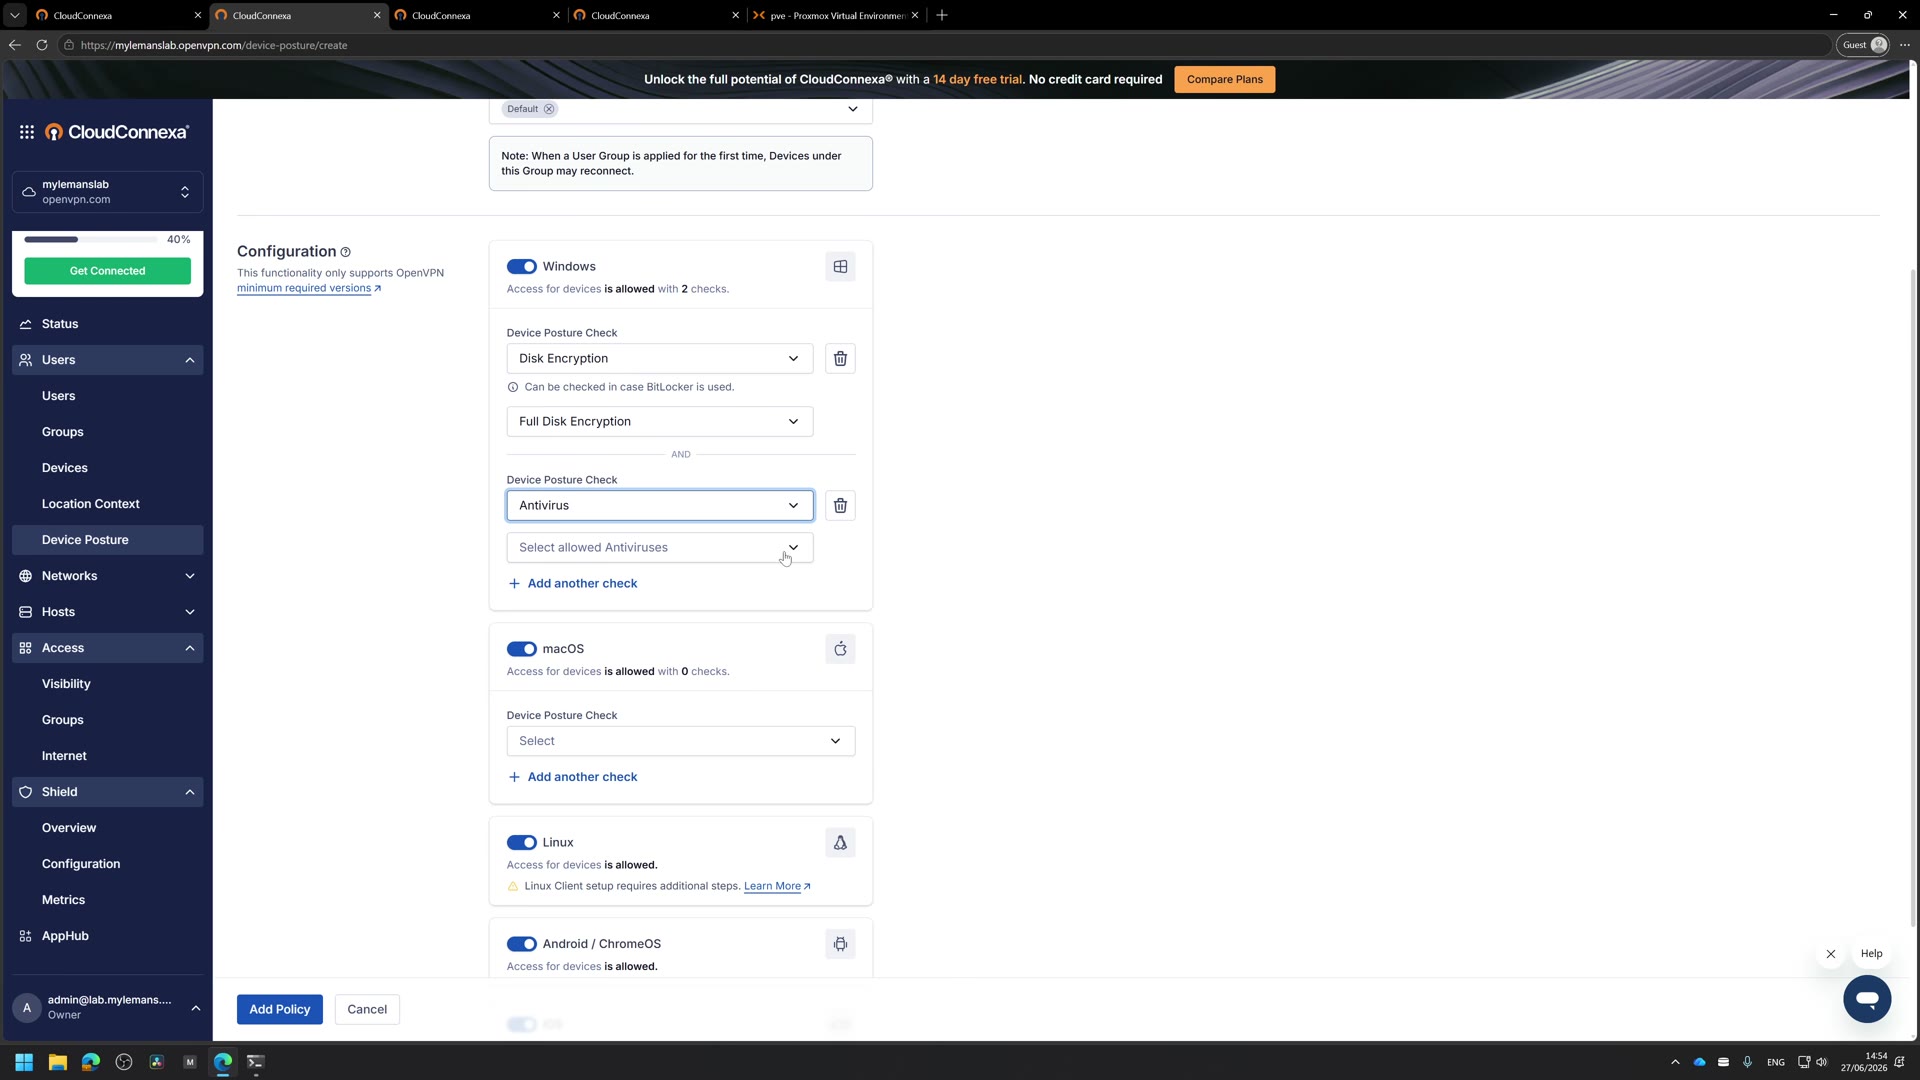
Device posture. The machine itself has to pass a check before it gets in. It is per operating system. On Windows I required two things: the disk has to be encrypted (BitLocker counts) and it has to be running antivirus. Fail either one and you do not get in, even with the right login on the right network.
Stack those up and look at what you have: identity at the door, a location it trusts, a device that is actually healthy, and a log of all of it. That is real zero trust, and it costs nothing. If you are a solo operator, a freelancer, or running a homelab, you can genuinely stop here.
Where free stops being enough
Not when it breaks. The day you add the one thing it was never built to manage on its own: other people.
The moment you hire someone, the job changes. Now you have joiners and leavers, access has to follow who someone actually is, and it has to come off cleanly the day they go. On the free tier you can do this by hand, one person at a time. That works until it doesn’t, and it will not hold up in an audit, because “I’m pretty sure I got everything” is not evidence.
That is the line. Not a wall you hit, a point you grow past. And it is exactly what the next tier is built for.
Step 4: Turn on SAML (this needs Essential)
Single sign-on is a paid feature, so this is where the 14-day trial starts. Everything above was free; this next part needs Essential.
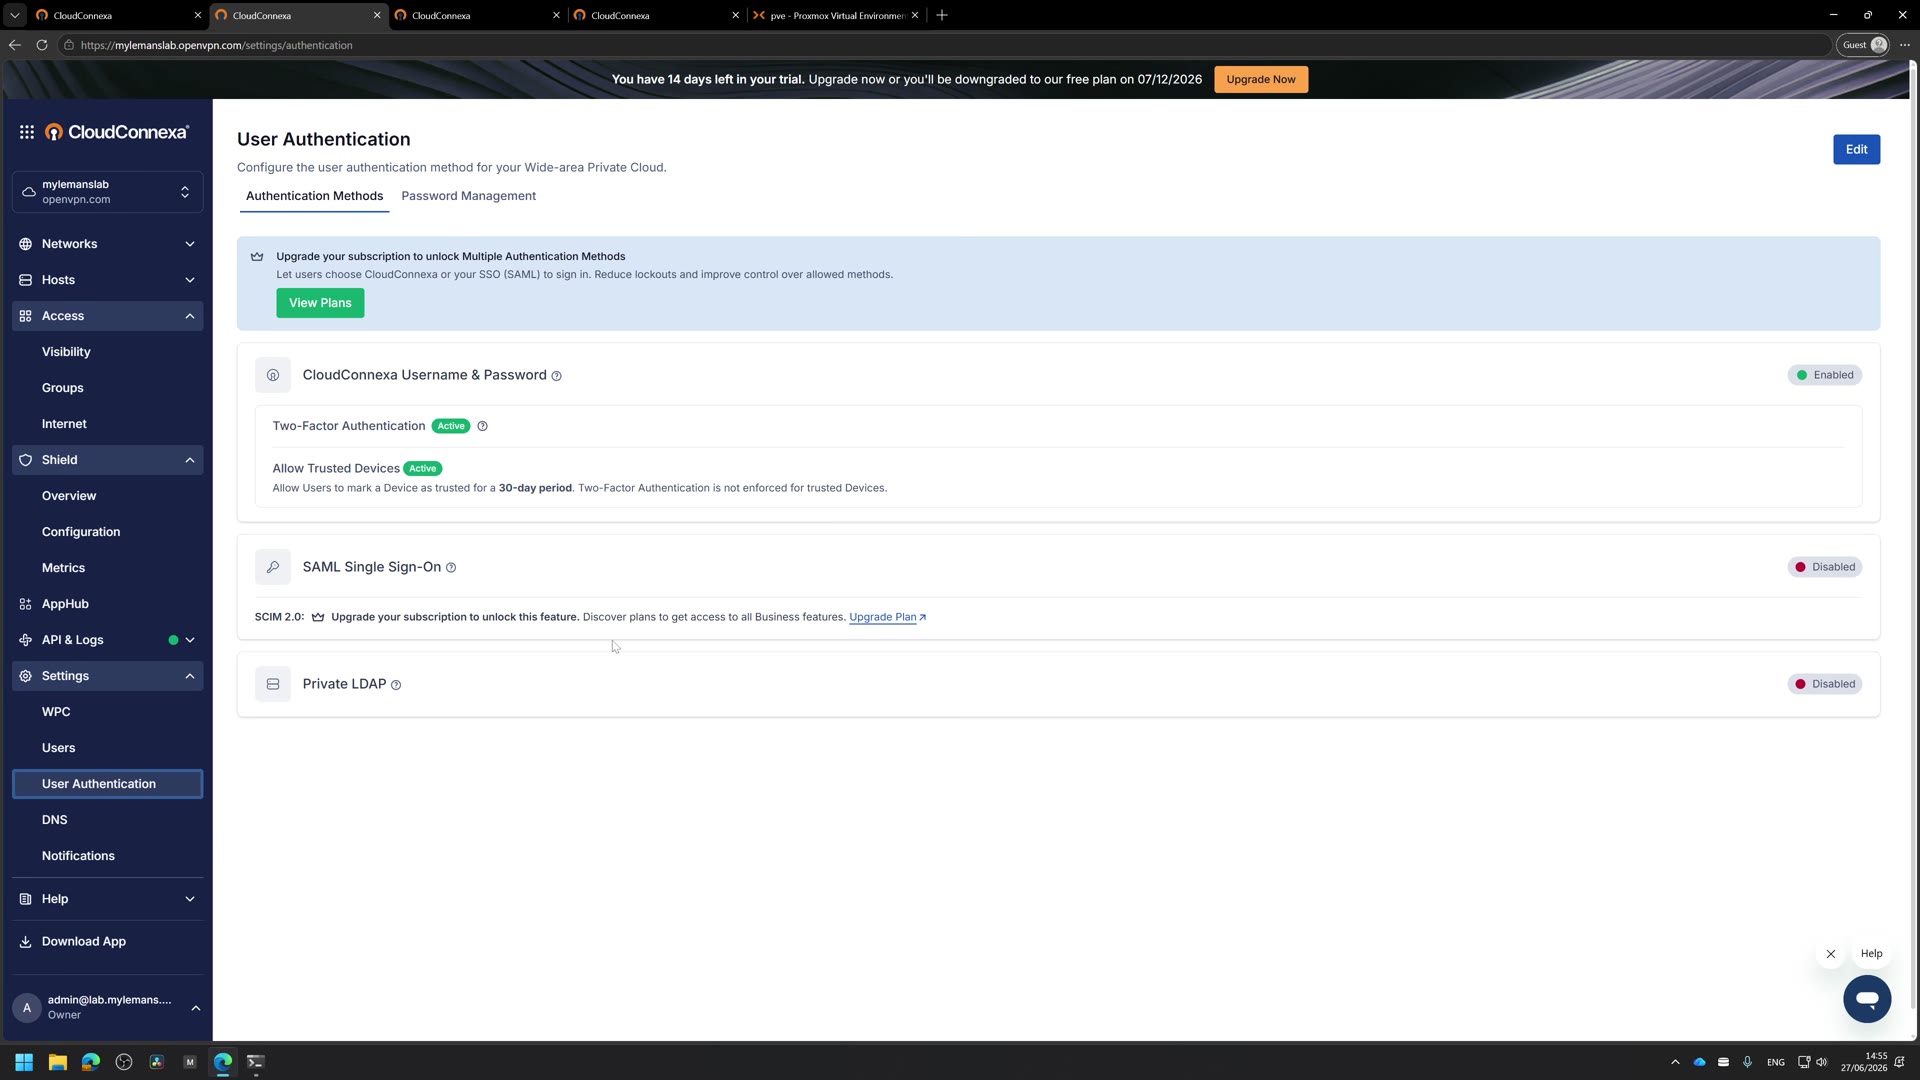
Go to Settings, then User Authentication, and switch on SAML (Single Sign-On). This is the change that ties access to your company directory instead of a hand-maintained user list.
Step 5: Register CloudConnexa in Microsoft Entra ID
Single sign-on always feels like a lot, but it is really just two systems agreeing on who you are.
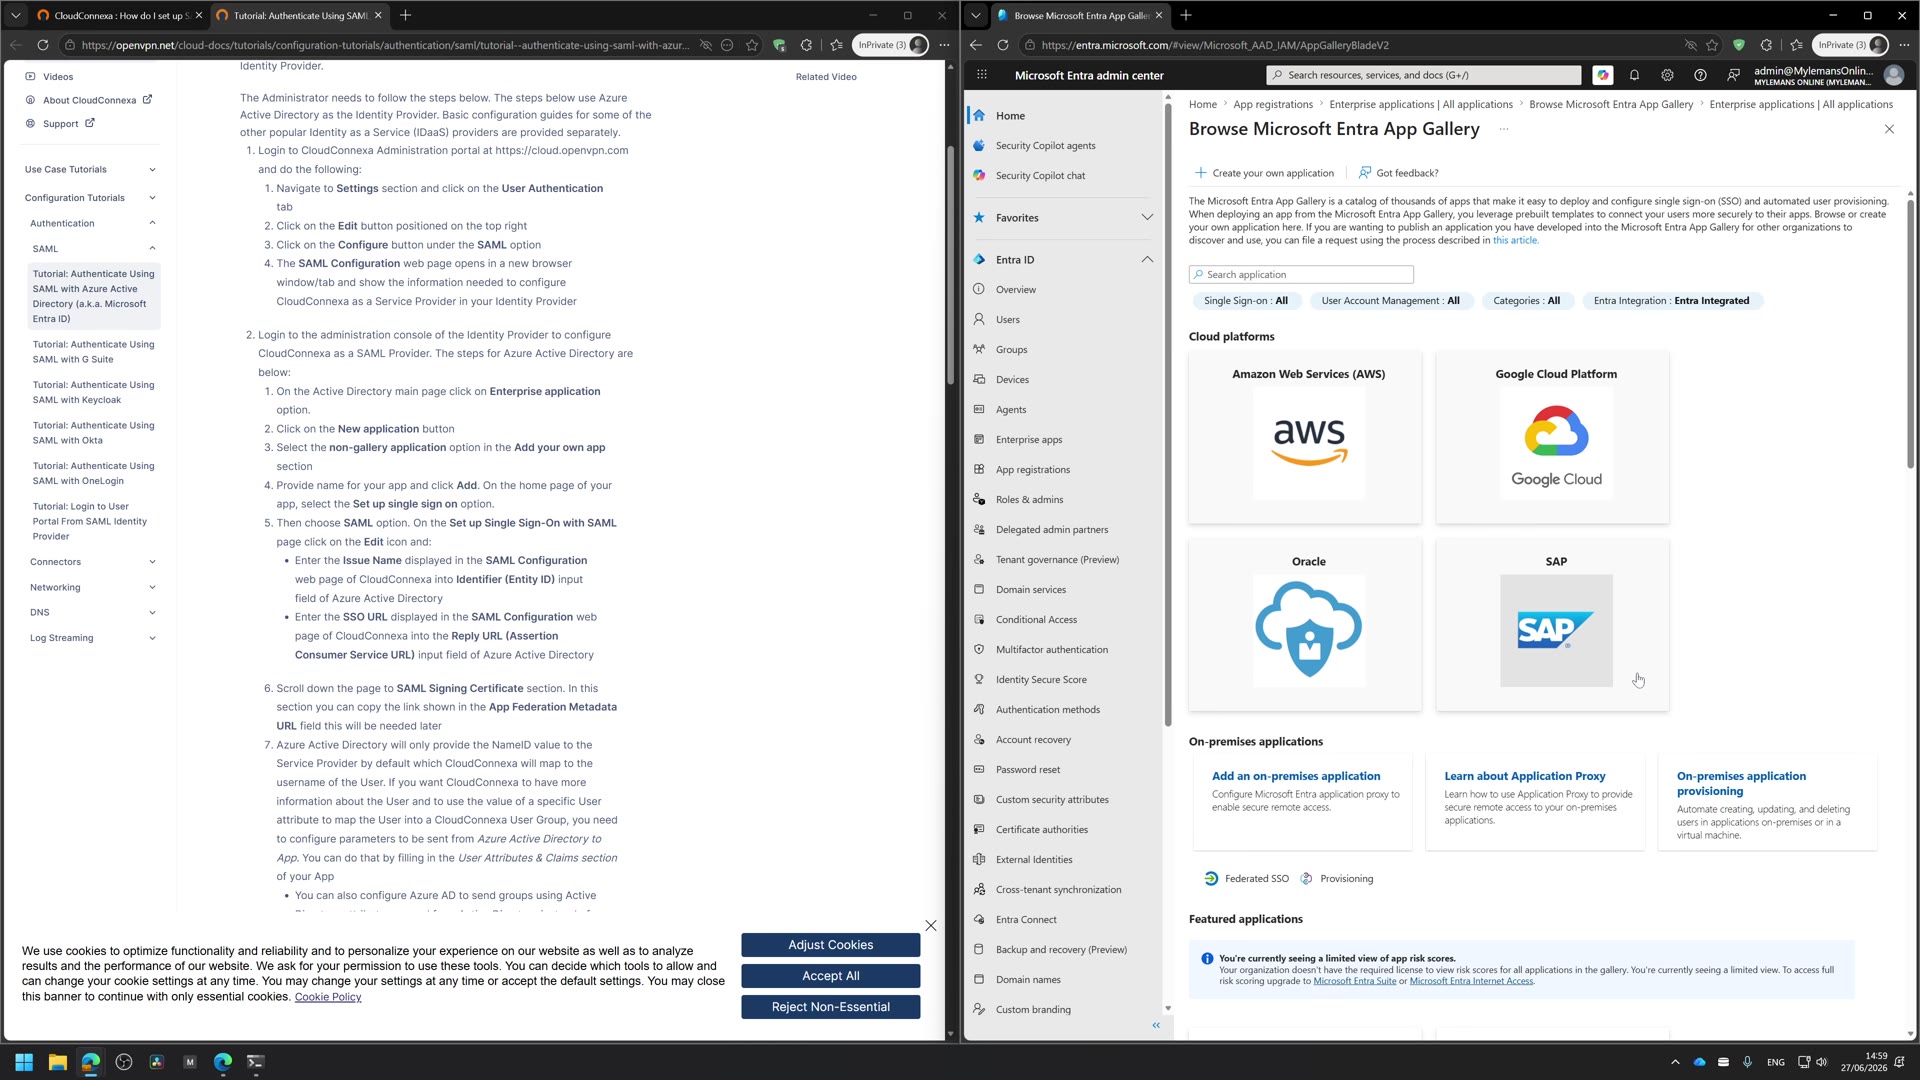
In the Microsoft Entra admin center go to Enterprise applications, then New application, then create your own application. Open its Single sign-on settings and choose SAML.
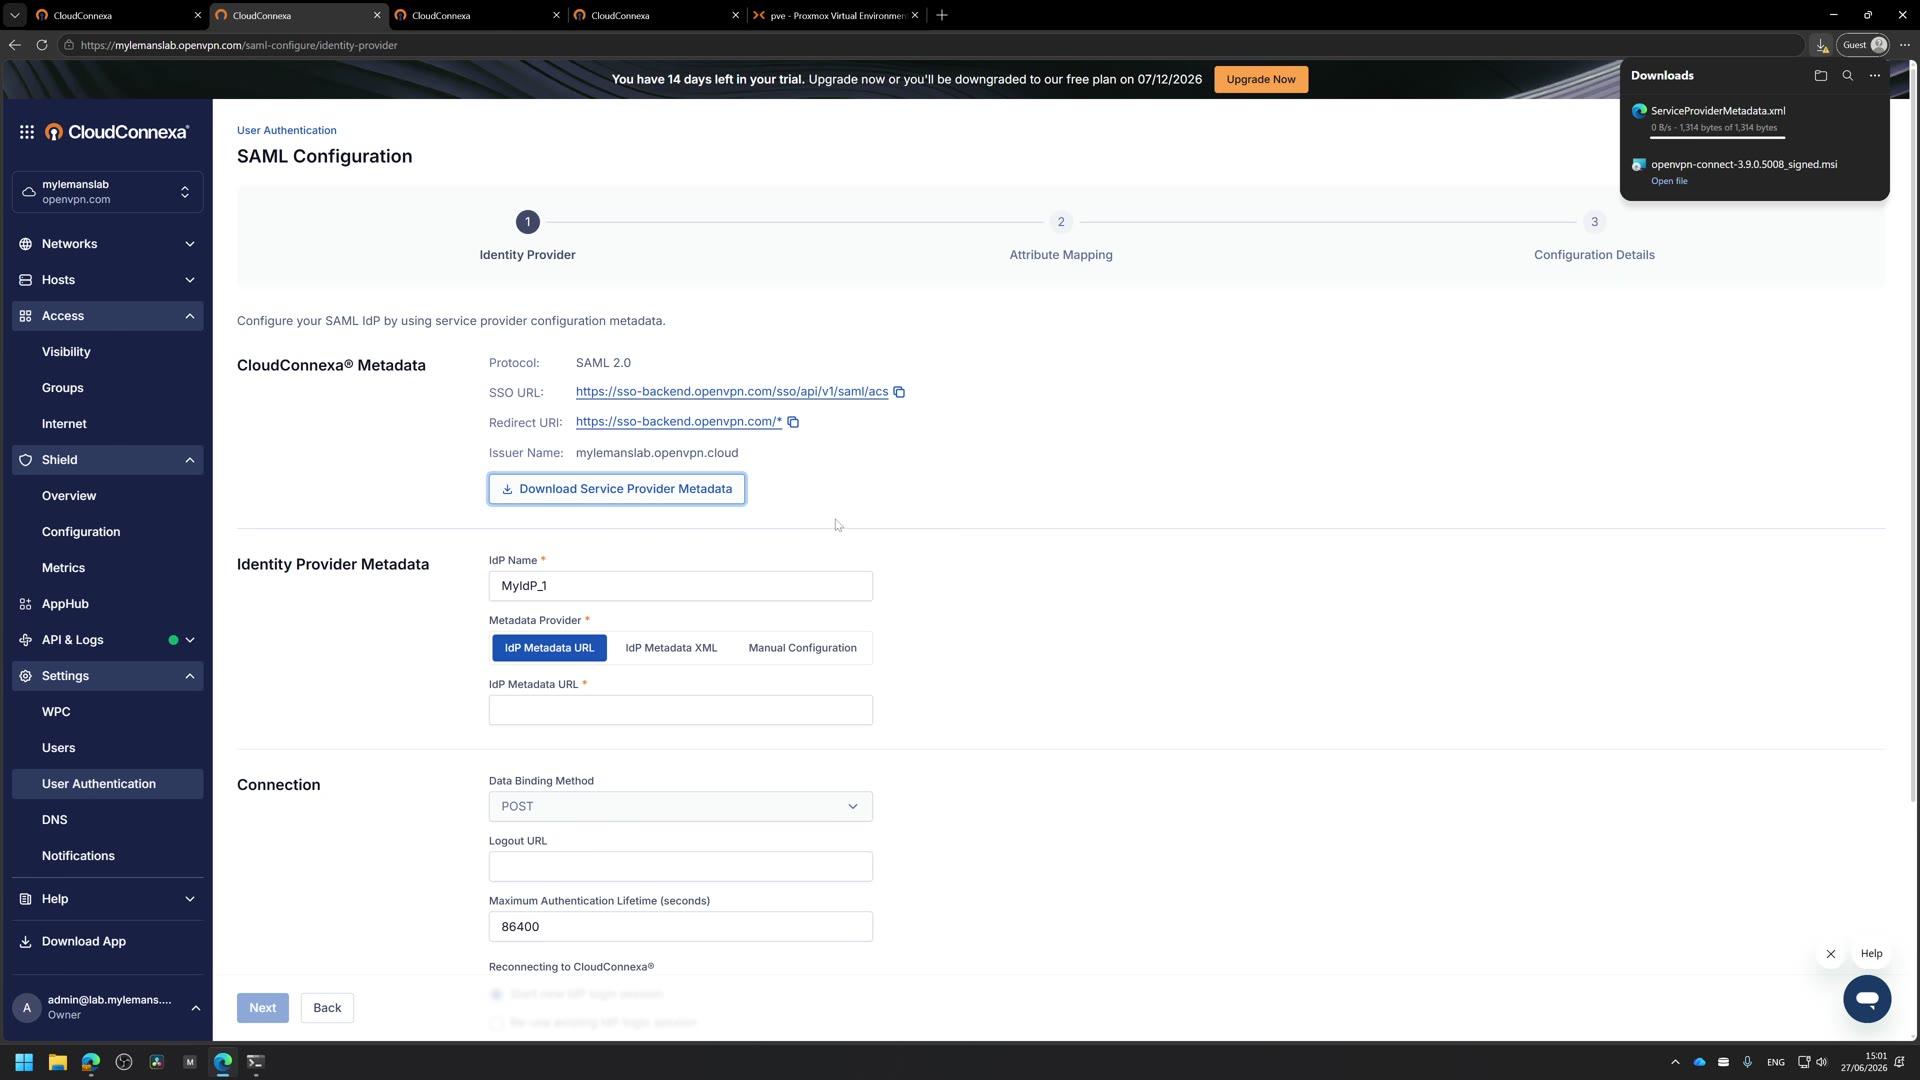
CloudConnexa gives you its side first: a sign-on URL, a reply URL, and an identifier. You paste those into Entra. Entra hands its side back: its own URL, its own identifier, and a signing certificate. That goes into CloudConnexa. That is the whole handshake. Each one holds the other’s details, plus a certificate so they cannot be faked.
Step 6: Map the group claim (the bit that does the real work)
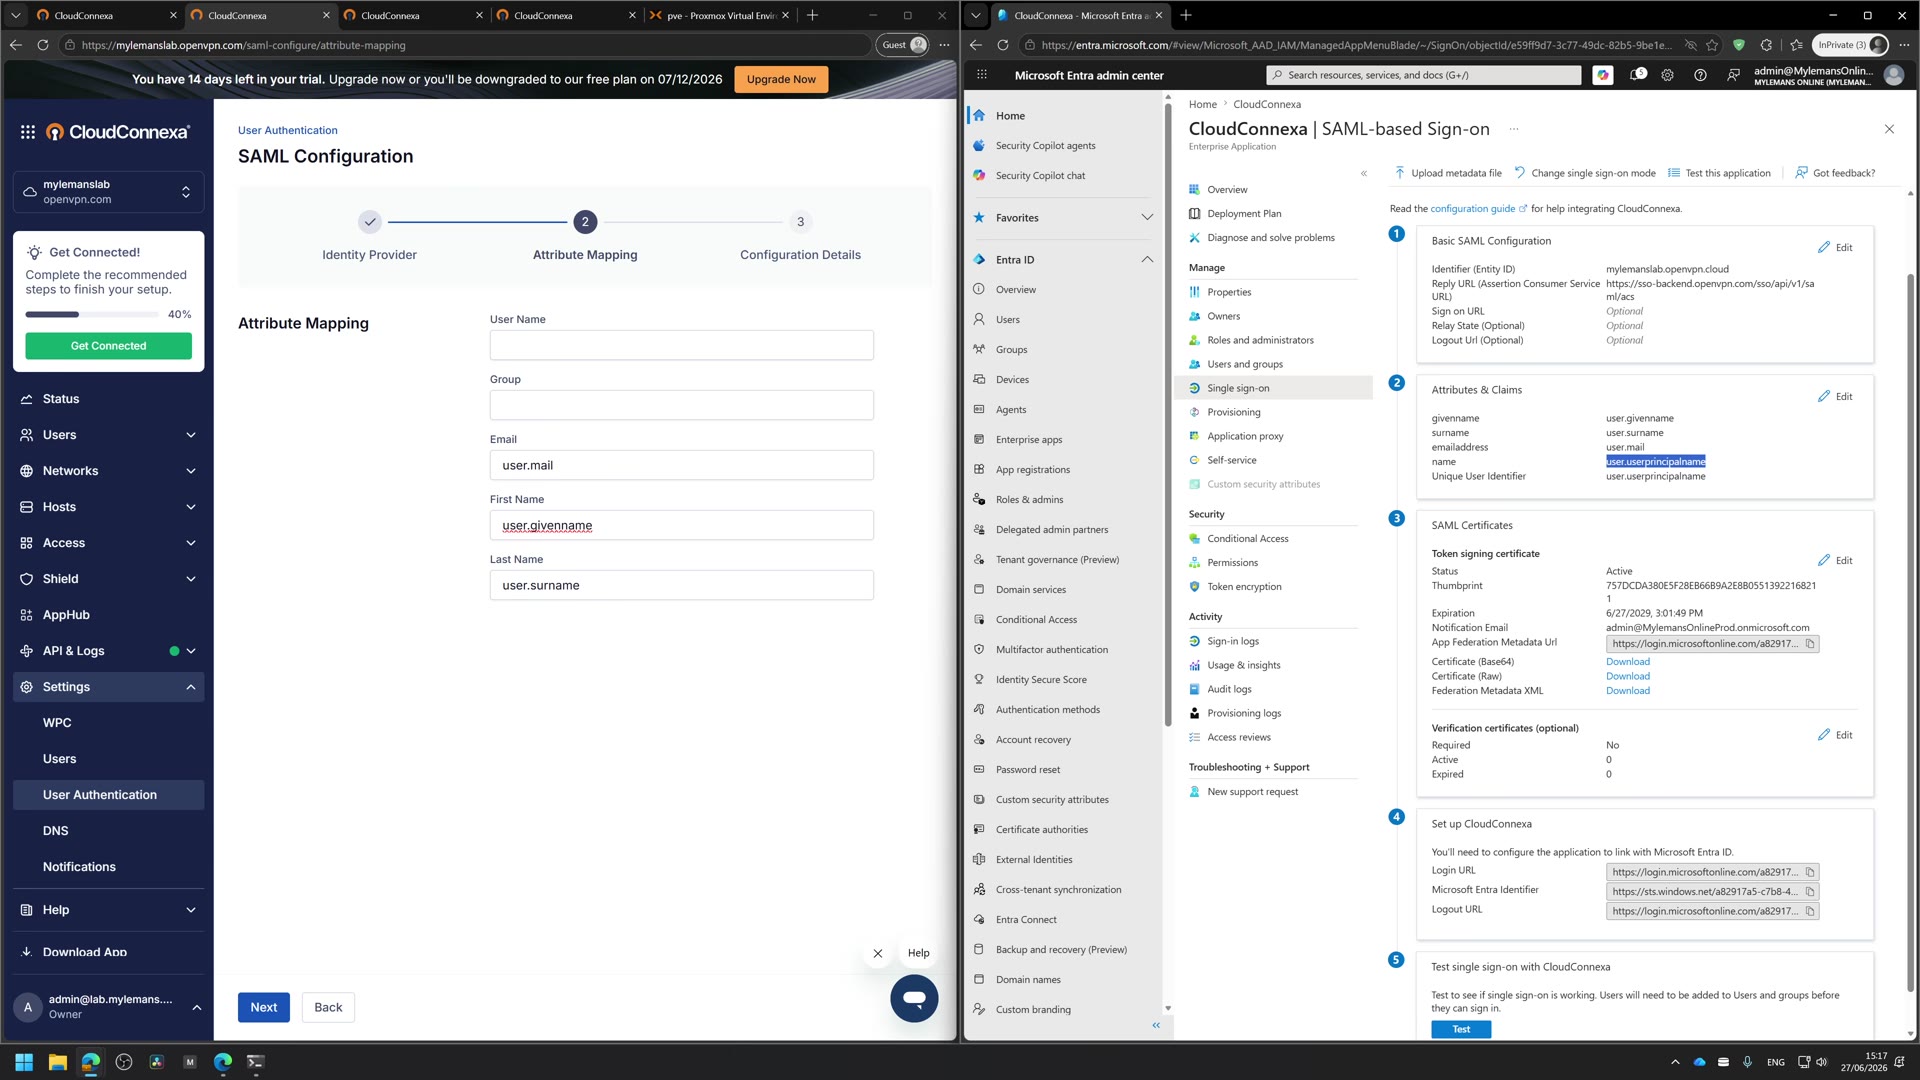
Then one screen that matters more than it looks: attribute mapping. Username, email, first and last name are routine. The one that does the real work is Group.
Map that, and someone’s Entra security group decides what they can reach inside CloudConnexa. Back in Entra, assign your group to the app. That is the join: put a person in the group and they are in. No group, nothing.
Groups are also the part most likely to misbehave, and OpenVPN’s own write-up is the best reference when they do: CloudConnexa: SAML (Azure AD) Troubleshooting of User Groups. Read it before you start guessing at claim names.
The blocker everyone hits: the first SSO test fails
Here is the part most guides skip. The first sign-in test will very likely fail, and the error is deliberately vague.
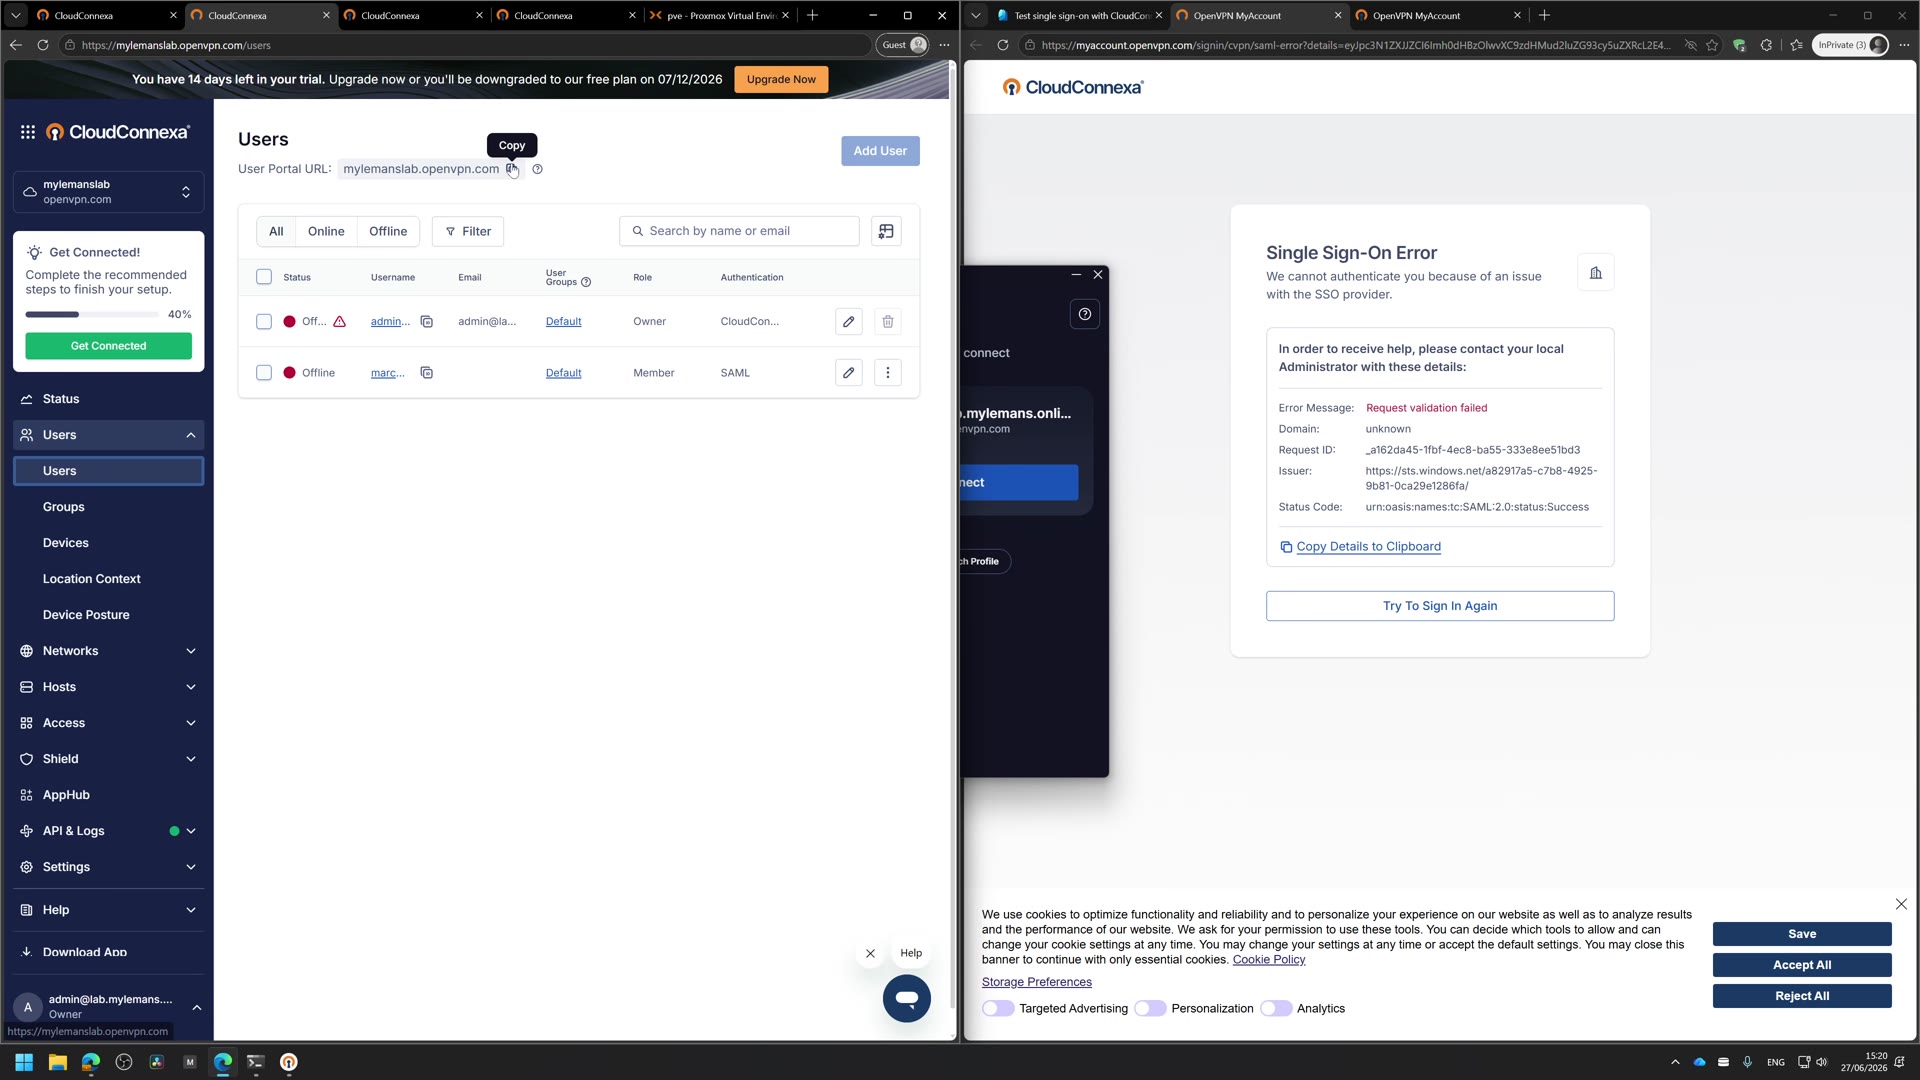 “Request validation failed.” Almost always a mismatch in the SAML config, not a deeper problem.
When you see “Single Sign-On Error, we cannot authenticate you because of an issue with the SSO provider,” do not start ripping things out. Use the “Copy Details to Clipboard” link on that error, then check four values, in order: the reply URL in Entra matches the assertion consumer URL CloudConnexa expects, the identifier or entity ID is identical on both sides (a trailing slash counts), the signing certificate is the current one, and the attribute CloudConnexa reads for the username actually exists in the Entra claim. In my build it was the reply URL. Fix the mismatch, hit “Try To Sign In Again,” and you are through.
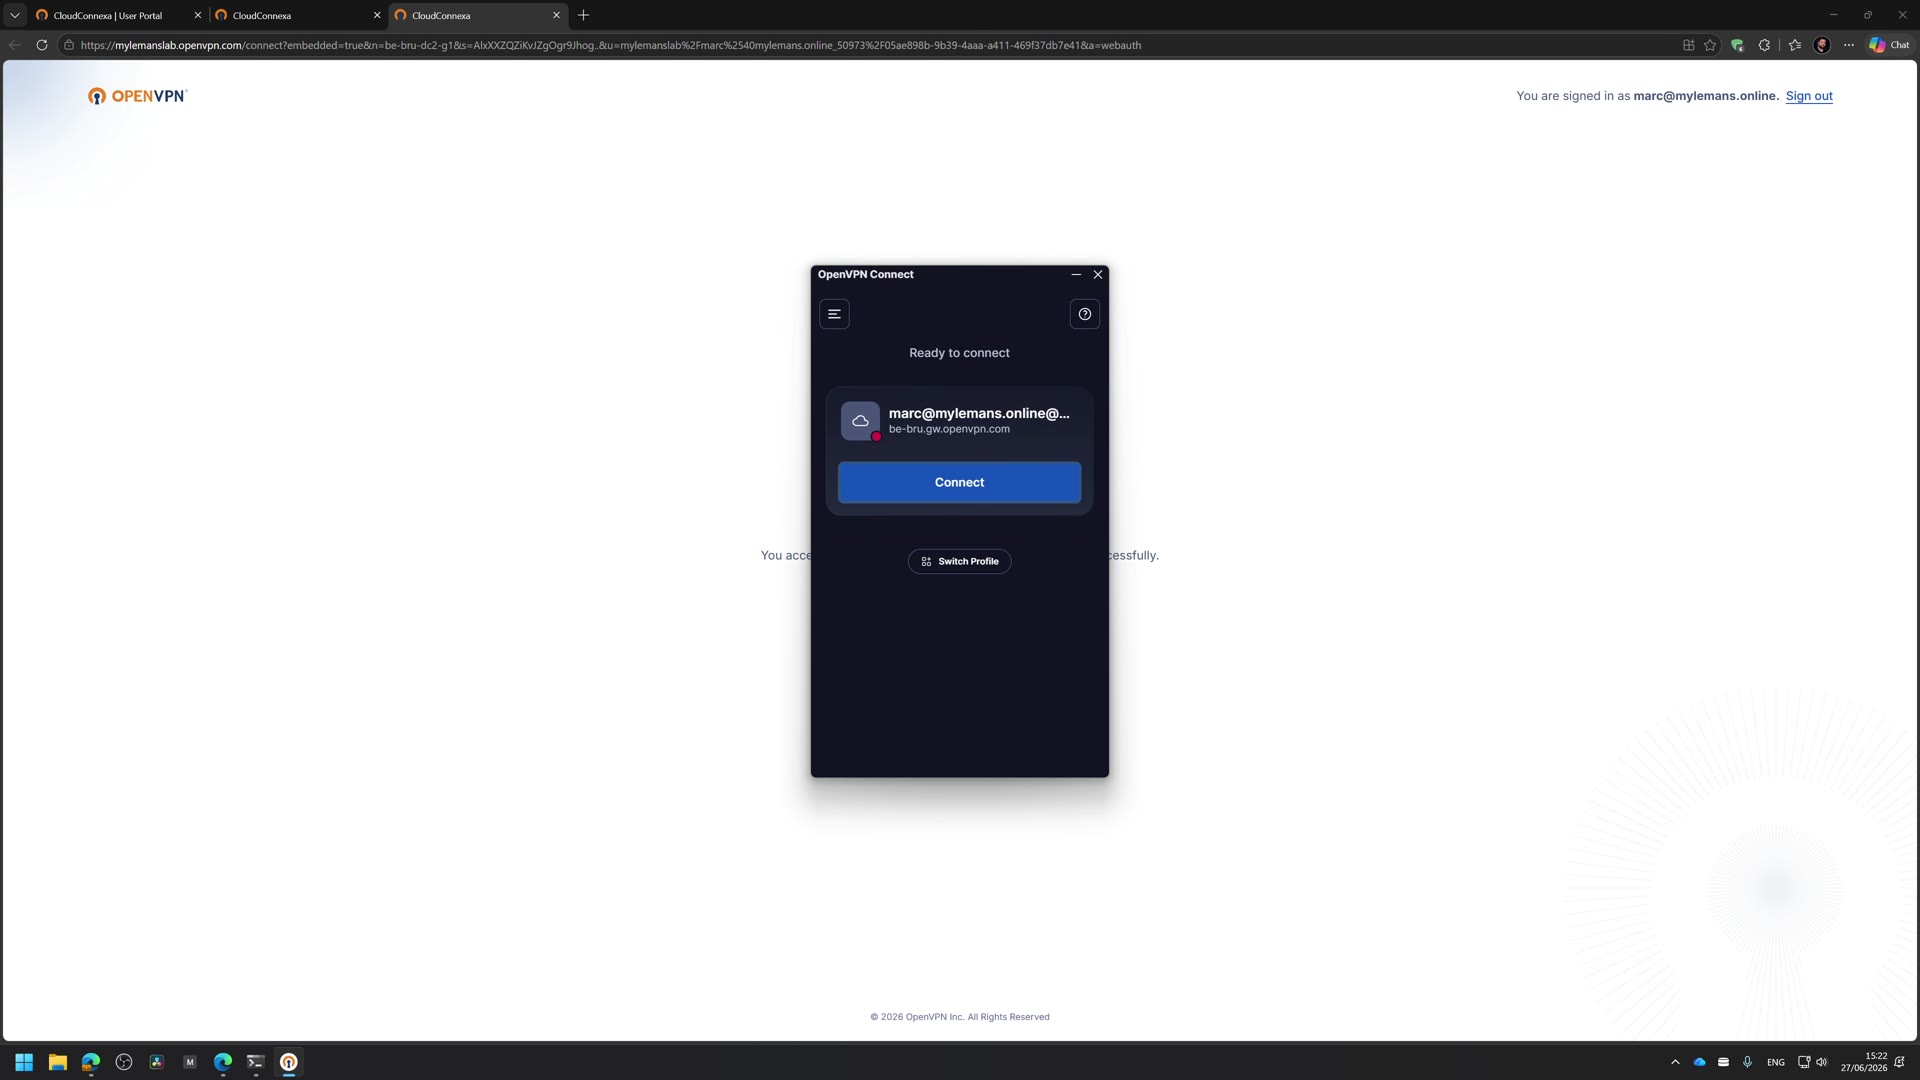 Signed in against Entra, profile imported, one click from connected.
Step 7: Install the client (one machine)
On a single machine, the fastest route is winget. Open an elevated terminal and run:
1
winget install OpenVPNTechnologies.OpenVPNConnect
Launch it, import the connection profile, sign in, done. For one box that is the whole story. The rest of this post is about doing it for fifty boxes without touching any of them.
Step 8: Deploy to a fleet with Intune, Cloud ID pre-filled
This is the section worth bookmarking, because the official guidance leaves out the part that actually bites.
You want users to install the app, open it, and connect, with no server URL to type and no Cloud ID to paste out of an email. The catch that shapes the entire design: the MSI installs the app machine-wide, in SYSTEM context, but the URL pre-fill is a per-user setting that has to be applied in the logged-in user’s context. You cannot do both in one app. So this is a two-app deployment, with the config app depending on the install app.
Three small scripts do it. One does the work, two are Intune detection rules. Grab them here:
- Apply-OpenVPNConfig.ps1 - generates the config, accepts GDPR, applies it, drops a detection marker
- Detect-OpenVPNConnect.ps1 - detection rule for the MSI (App 1)
- Detect-OpenVPNConfig.ps1 - detection rule for the config (App 2)
App 1: the MSI (system context)
Wrap the OpenVPN Connect MSI with the Win32 Content Prep Tool:
1
IntuneWinAppUtil.exe -c "C:\Packaging\OpenVPNConnect" -s "OpenVPN-Connect.msi" -o "C:\Packaging\Output"
Then in the admin center go to Apps > Windows > Add > Windows app (Win32) and upload the .intunewin. Intune reads the MSI and pre-fills most fields. I make the install fully silent:
| Field | Value |
|---|---|
| Install command | msiexec /i "OpenVPN-Connect.msi" /qn /norestart |
| Uninstall command | msiexec /x "{product-code}" /qn /norestart (auto-filled) |
| Install behavior | System |
| Detection | MSI product code, or Detect-OpenVPNConnect.ps1 for a minimum version |
| Requirements | Windows 64-bit |
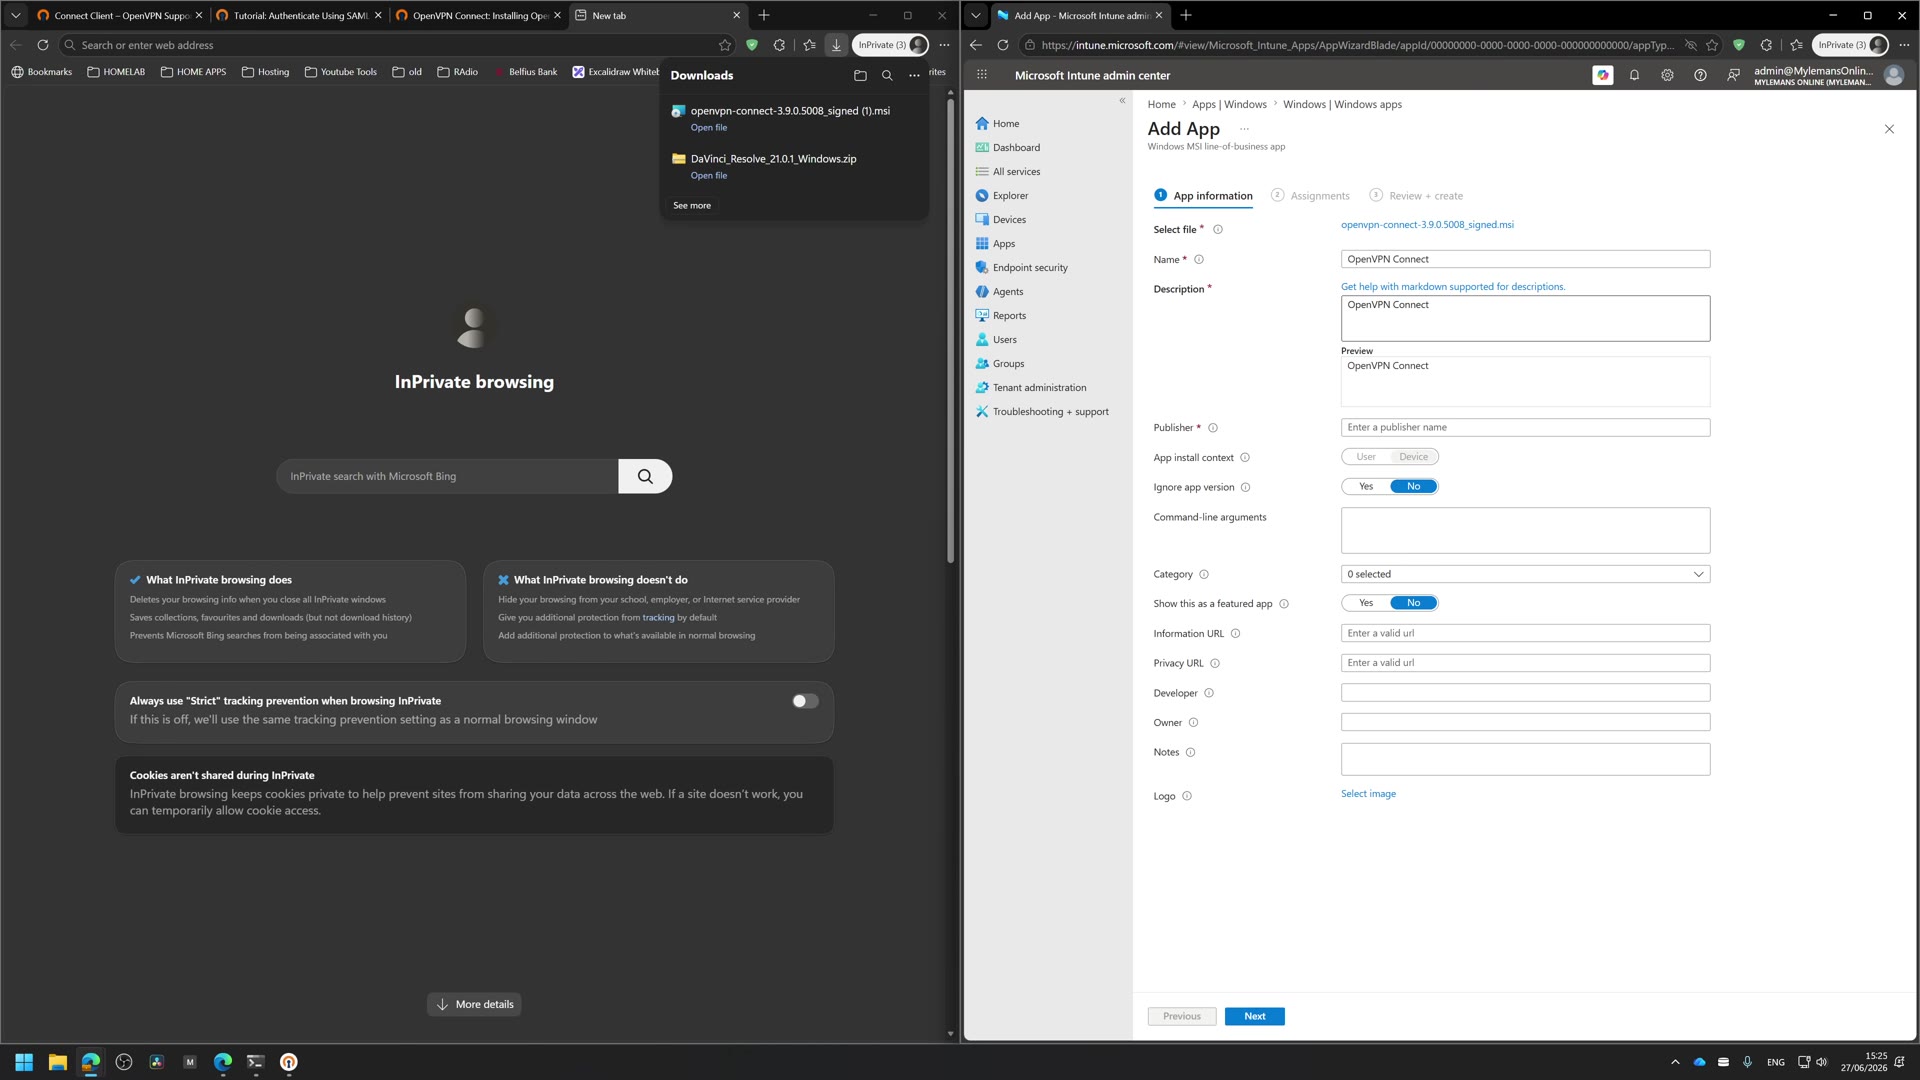
App 2: the config (user context)
App 2 carries only the apply script. The config file is generated at runtime, so nothing else is bundled. Wrap the script the same way, add a second Win32 app, and this is where your Cloud ID goes, on the install command line:
| Field | Value |
|---|---|
| Install command | powershell.exe -ExecutionPolicy Bypass -WindowStyle Hidden -File "Apply-OpenVPNConfig.ps1" -Url https://yourID.openvpn.com -CloseWhenDone |
| Uninstall command | cmd /c del "%LOCALAPPDATA%\OpenVPN Connect\ocfg-applied.tag" |
| Install behavior | User |
| Detection | Custom script: Detect-OpenVPNConfig.ps1 |
Before you upload the detection script, open it and set $expectedUrl to the same URL you put on the install command line. Detection scripts cannot take parameters, so that one value lives in two places. Keep them in sync or App 2 loops trying to reinstall.
The dependency is what enforces order
On App 2, open Dependencies, add App 1 with Automatically install enabled. Now the MSI always lands before the config tries to apply, and assigning App 2 to a group pulls App 1 along with it.
The setting that silently breaks everything: on any PowerShell detection script, leave Run script as 32-bit process on 64-bit clients set to No. Flip it to Yes and WOW64 redirection points the 64-bit
Program Fileslookup at the x86 path, so a perfectly good install reads as missing and Intune reinstalls forever. This is the single most common reason these deployments fail, and nothing in the UI warns you.
The success dialog, and the honest workaround
OpenVPN Connect has no real headless mode yet, so applying a config pops an informational “App configuration was successfully applied” dialog with no supported flag to suppress it. The -CloseWhenDone switch is the workaround: the config is already saved by the time the dialog appears, so quitting the app tears the dialog down with it. Worst case a user sees a brief flash, and only if they happen to be looking at the screen mid-sync.
The pro check: confirm it, do not assume it
Do not trust “I assigned it.” On a test machine after the sync, confirm the marker file exists at %LOCALAPPDATA%\OpenVPN Connect\ocfg-applied.tag and that its contents match your URL, and confirm both apps report Installed in Intune.
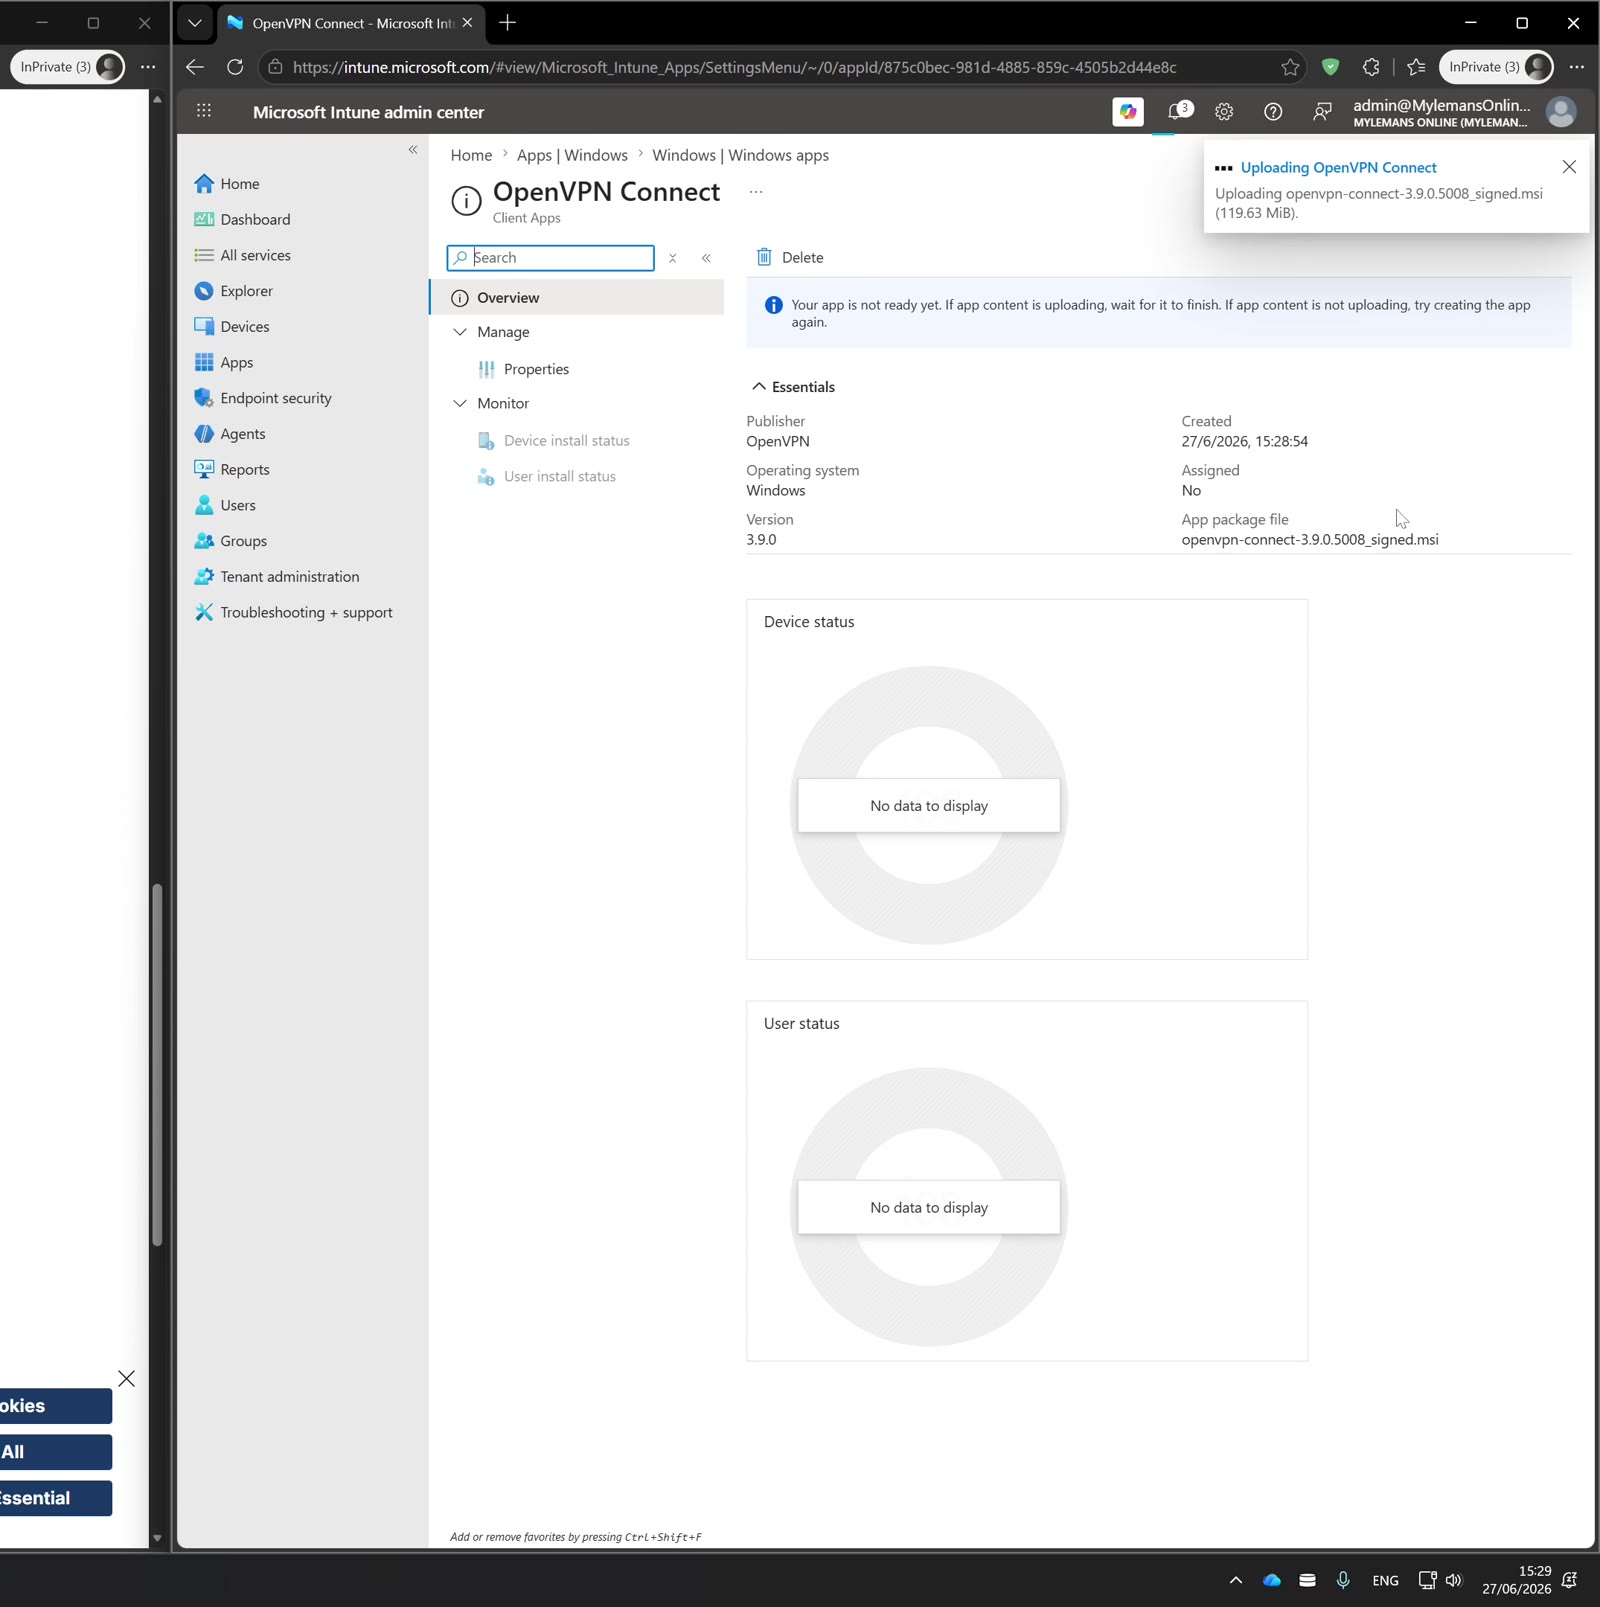
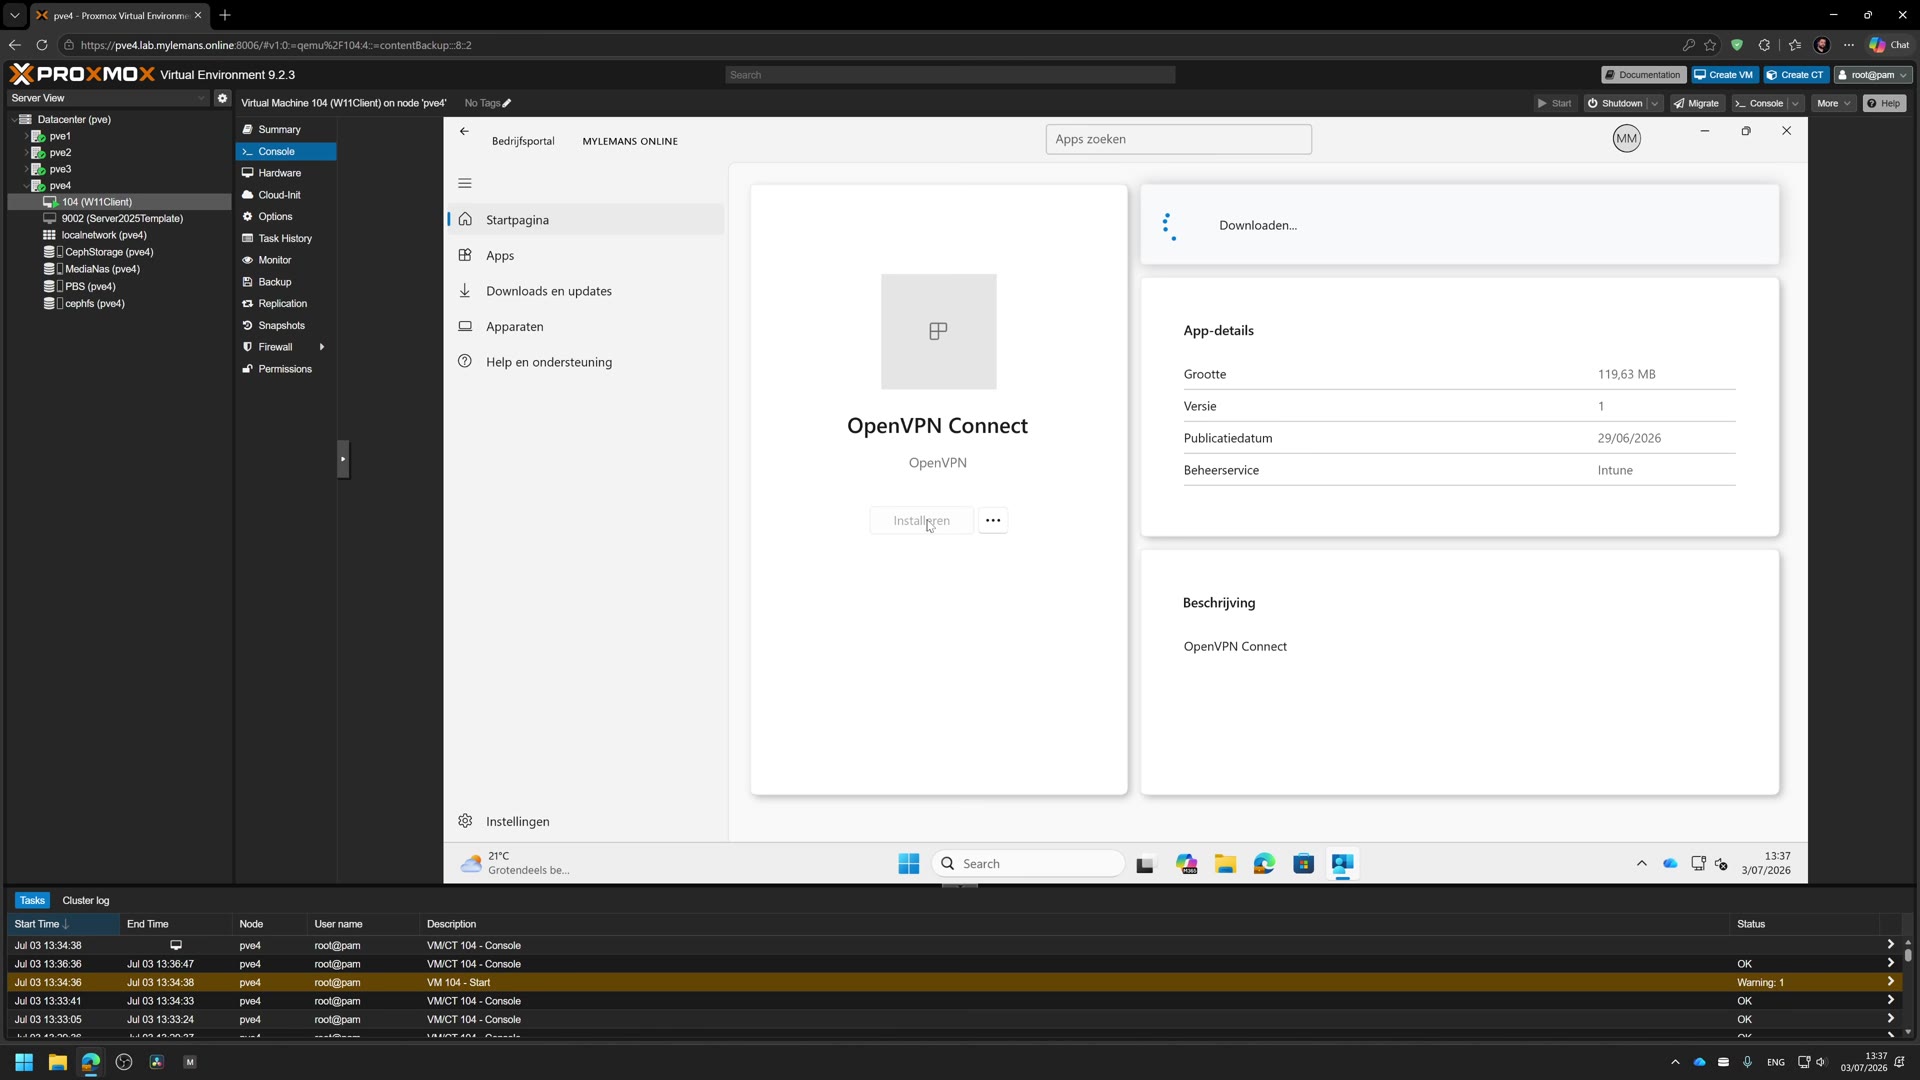
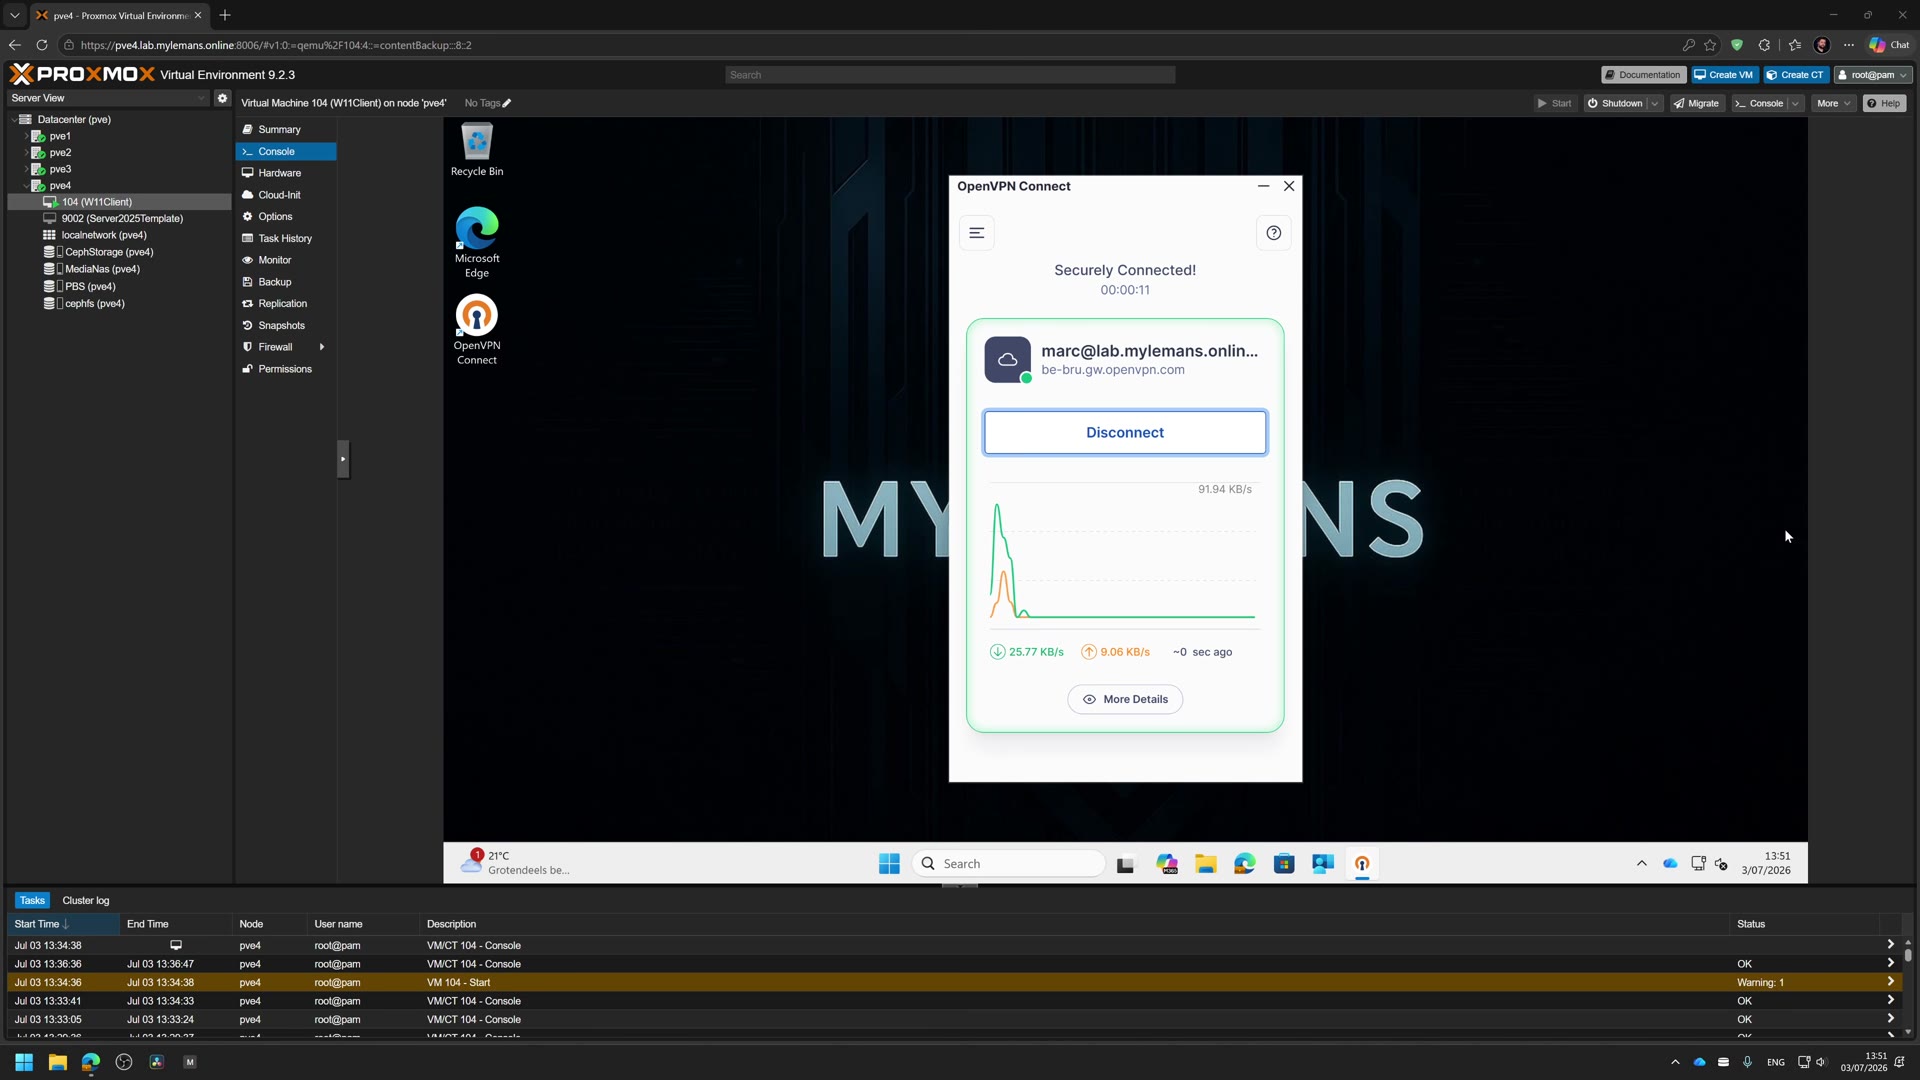
Then open the app on the device. The Cloud ID is already there, the user signs in with their company identity, and they are connected.
When something misbehaves, the logs are in C:\ProgramData\Microsoft\IntuneManagementExtension\Logs\. IntuneManagementExtension.log covers app processing; AgentExecutor.log covers the script runs.
The offboarding trap (this is the whole point)
Here is the moment everything above was building to, and the one that catches almost everyone.
Someone leaves. You open CloudConnexa, remove them from the user list, job done, right? Except their company identity is still live. And they are still in. This is where people get burned: the bit where everyone assumes access is gone and it quietly is not.
The fix is to do it once, at the identity layer. Disable the account in Entra, or pull them out of the security group, and every door that group opened shuts at the same time. That is the thing the free tier cannot do on its own, and it is the precise moment free stops being enough.
Then prove it. Open the log and confirm the blocked attempt is actually sitting there. Clicking “remove” is not proof; the logged denial is. That line is also what you hand an auditor when they ask.
Free vs Essential, honestly
This is the part that decides whether you spend a cent.
Free is genuinely complete for one person: $0 for 5 seats (and note the seat pool covers users and connectors, so a connector uses one), split tunnel, Cyber Shield with domain filtering and intrusion detection, DNS and audit logs, one location policy, one device-posture policy, and 7-day log retention you export by hand. No log streaming.
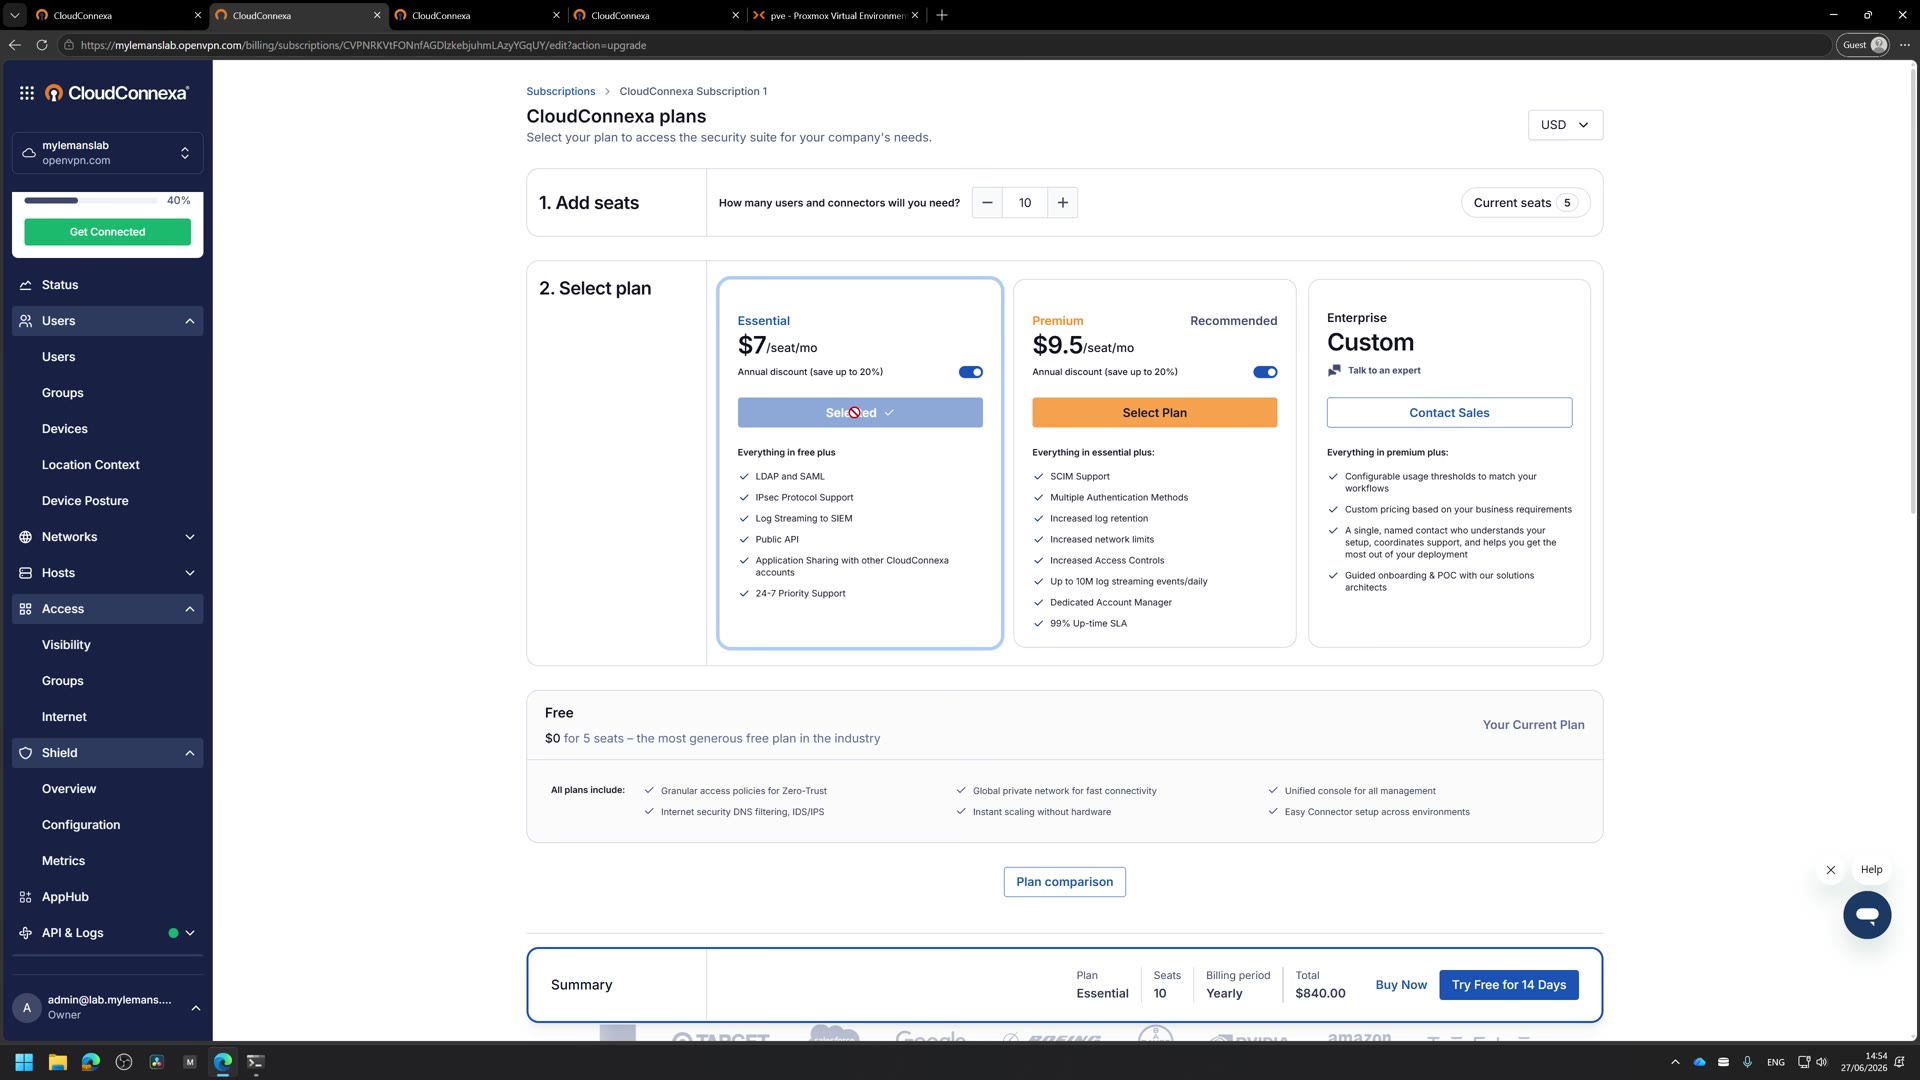
Essential is what a team needs, at $9 per seat per month, or $7 if you pay for the year. It adds LDAP and SAML (so offboarding is one move), IPsec, log streaming to a SIEM, a public API, application sharing, and 24/7 priority support, with 30-day retention.
And to stay fair in the other direction: Essential is not the top. Premium sits above it at $9.50 per seat per month, adding SCIM, multiple authentication methods, longer retention, higher network and access limits, up to 10M log-streaming events a day, a dedicated account manager and a 99% uptime SLA. Above that is Enterprise, priced on request. If you are large or in a heavily regulated sector, that is your conversation. For most small businesses and MSPs, Essential is both the floor and the ceiling.
On NIS2, the honest mapping: this covers access control and the asset side of who can reach what, plus multi-factor and secured transport, and the logging supports your incident handling and proving your controls work. It does not back up your data, manage your vulnerabilities, train your staff, or govern your encryption policy. So do not let anyone sell it to you as NIS2 in a box. General guidance, not legal advice.
FAQ
Is the CloudConnexa free tier enough for me? If you are a solo operator, a freelancer, or running a homelab, yes. It is a real product, not a trial that expires: split tunnel, intrusion detection, logging, a location rule and a device-posture policy are all included. You grow into the paid tier the day you add people, because that is when offboarding has to be one clean move and survive an audit.
Does the connector use one of my free seats? Yes. The seat question in the portal reads “how many users and connectors,” so the connector counts toward the five.
Why two Intune apps instead of one? Because the MSI installs machine-wide in SYSTEM context, but pre-filling the Cloud ID is a per-user setting applied in the user’s context. One app cannot run in both. App 2 (user context) depends on App 1 (system context) so the order is enforced.
My Intune app reinstalls on every sync. Why? Two usual causes. Either the detection script is running as 32-bit (set “Run script as 32-bit process on 64-bit clients” to No), or the -Url on App 2 and $expectedUrl in its detection script do not match after normalisation, usually a stray trailing slash or a missing scheme.
Why does the first SAML sign-in fail? Almost always a config mismatch, not a real fault. Check the reply URL, the identifier or entity ID, the certificate, and the username attribute on both the Entra and CloudConnexa sides. Use “Copy Details to Clipboard” on the error to see exactly what failed.
Does this make me NIS2 compliant? It covers access control, multi-factor, secured transport, and the logging that supports incident handling. It does not back up your data, manage vulnerabilities, train your staff, or govern encryption policy, so do not treat it as NIS2 in a box. General guidance, not legal advice.
Recap
You started from nothing: an account, a small Linux VM, and a one-line script. That got you a connector reaching out with nothing exposed inbound, plus split tunnel, intrusion detection, logging, a location rule and device-posture checks, all free and genuinely enough for one person. Then, for a team, you tied sign-in to Entra over SAML, mapped the group claim so access follows group membership, pushed the client to a fleet through Intune with the Cloud ID pre-filled, and made offboarding a single move at the identity layer with a logged denial to prove it.
Prefer to watch? The full build is on Mylemans Online on YouTube.
Make it a skill, not a one-off. I built a free, no-signup learning path on Mylemans Labs that walks you through securing remote access for a small environment in the right order. Start here: Mylemans Labs remote-access path